
Android 12 and Its Features?
Android 12 is all about improved personalization and revamped user interface that changes the way to bring more dynamic expression and a whole new design element. It’s a successor of the last-gen Android 11 which was basically focused on the privacy and security of the user data. While the Android 12 not only focused on privacy features but also on visual treatment.
Talking about the features, it has all new and colorful yet minimal widgets that are now more dynamic than ever before. While the dynamic theme with the wallpapers is more expressive as per your mood. The notification shade, lock screen, and its notifications, glance screen, volume controls, quick shortcut tiles, new power menu, transitions or animations, etc everything looks & feels great whatsoever with ‘Material You’ design.
Meanwhile, the impressive Privacy Dashboard feature, the privacy indicator on the top of the screen is also great. Whereas scrolling screenshot support, improved notifications, quick reply feature, on-device search feature, easy Wi-Fi sharing, one-handed mode, quick back tap feature, haptic-coupled audio effect, Android 12 updates via Google Play, App hibernation, all-new emojis, improved auto-rotate, and a lot more.
What is Pixel Experience ROM?
As the name suggests, ROM brings the real Google Pixel Experience ROM on your device. It has all the features and applications which comes out of the box with Google Pixel smartphone. Now you can experience the real Pixel Smartphone with this ROM. With this ROM, you can enjoy
- All Google Apps
- Pixel Launcher with round icon support
- Pixel Boot Animation
- Google Assistant
- Pixel Sounds
- Pixel Live Wallpapers
- Root
- Round Icon for Settings
- Pixel’s blue accent
Here you can download and install the latest Google Pixel Experienced ROM for on your device based on Android 10 now available. The ROM is stable and can be used as a daily driver.
Steps to Install Pixel Experience ROM on on your device
To install this ROM on on your device, First of all, you need to Unlock Bootloader on your device, and then Install TWRP Recovery. If you already have TWRP, then you can simply follow the below guide to Install TWRP Recovery.
Pre-Requisite:
- Supported Smartphone: (Laurel Sprout)
- Charge on your phone to a sufficient battery level to avoid any sudden shutdowns during the process.
- We strongly recommend you to take a complete backup of your personal data, including the internal storage. The phone will be formatted, so be prepared for it. You can also follow our Android backup guide for the same. [Follow any method]
- How to Backup Your Android Phone Withot ROOT
- How to Backup Complete Stock or Custom ROM using TWRP recovery
- Backup Your Android Apps and Data with Titanium Backup
- How to Backup Your Android Phone Directly to PC with TWRP!!
- How to Backup Your Data on Android device
- If you already have TWRP: then you can Create and Restore Nandroid Backup via TWRP
- You need a USB cable to connect your phone to PC.
- Unlock Bootloader: You need to Unlock Bootloader on your device.
- TWRP Recovery: To flash this, You need TWRP Recovery on your device.
Requirements!
You must have TWRP Recovery Installed on your device.
(Learn here: How to install)
XDA Development Forum: Here!
(you can check here more information about ROM what is working and what’s not working)
▼DOWNLOAD FILES
PIXEL EXPERIENCE ROM
GAPPS
Check-out which G-App is compatible for your device from Here!
Instructions to Install
1. First Download & Install a Custom Recovery on your device (TWRP is recommended), If you already have installed then skip this step.
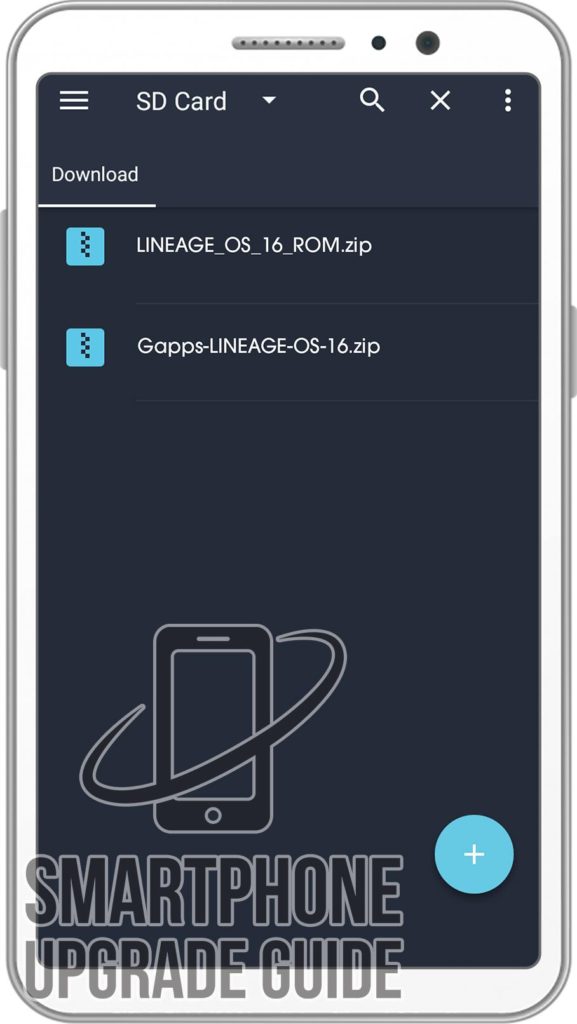
2. Download ROM & Gapps .zip file and save it on your device’s Internal storage or SD Card.
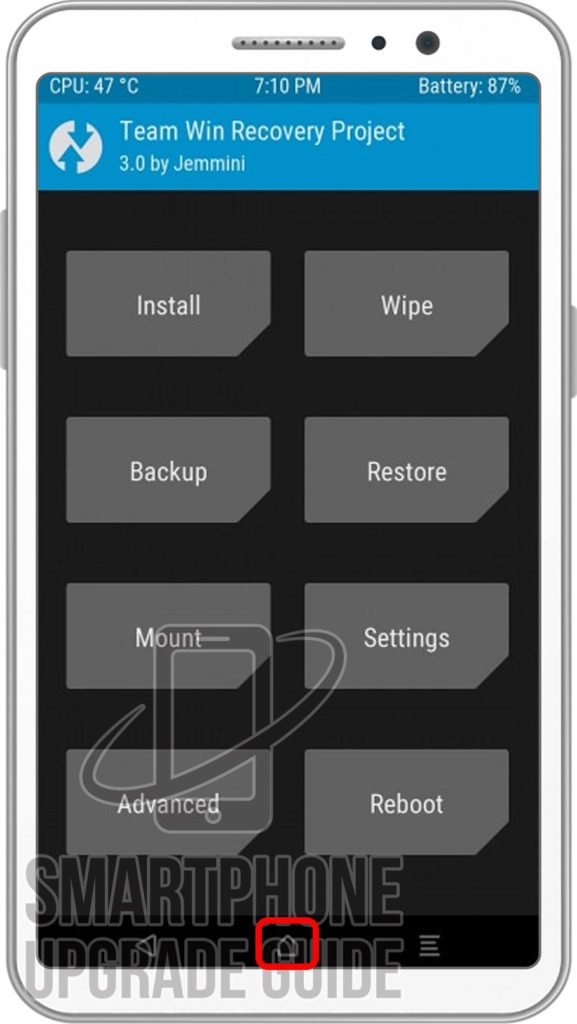
3. Now Boot your device into TWRP Recovery Mode. (if you don’t know how to boot your device into twrp recovery then you can search it on Google)
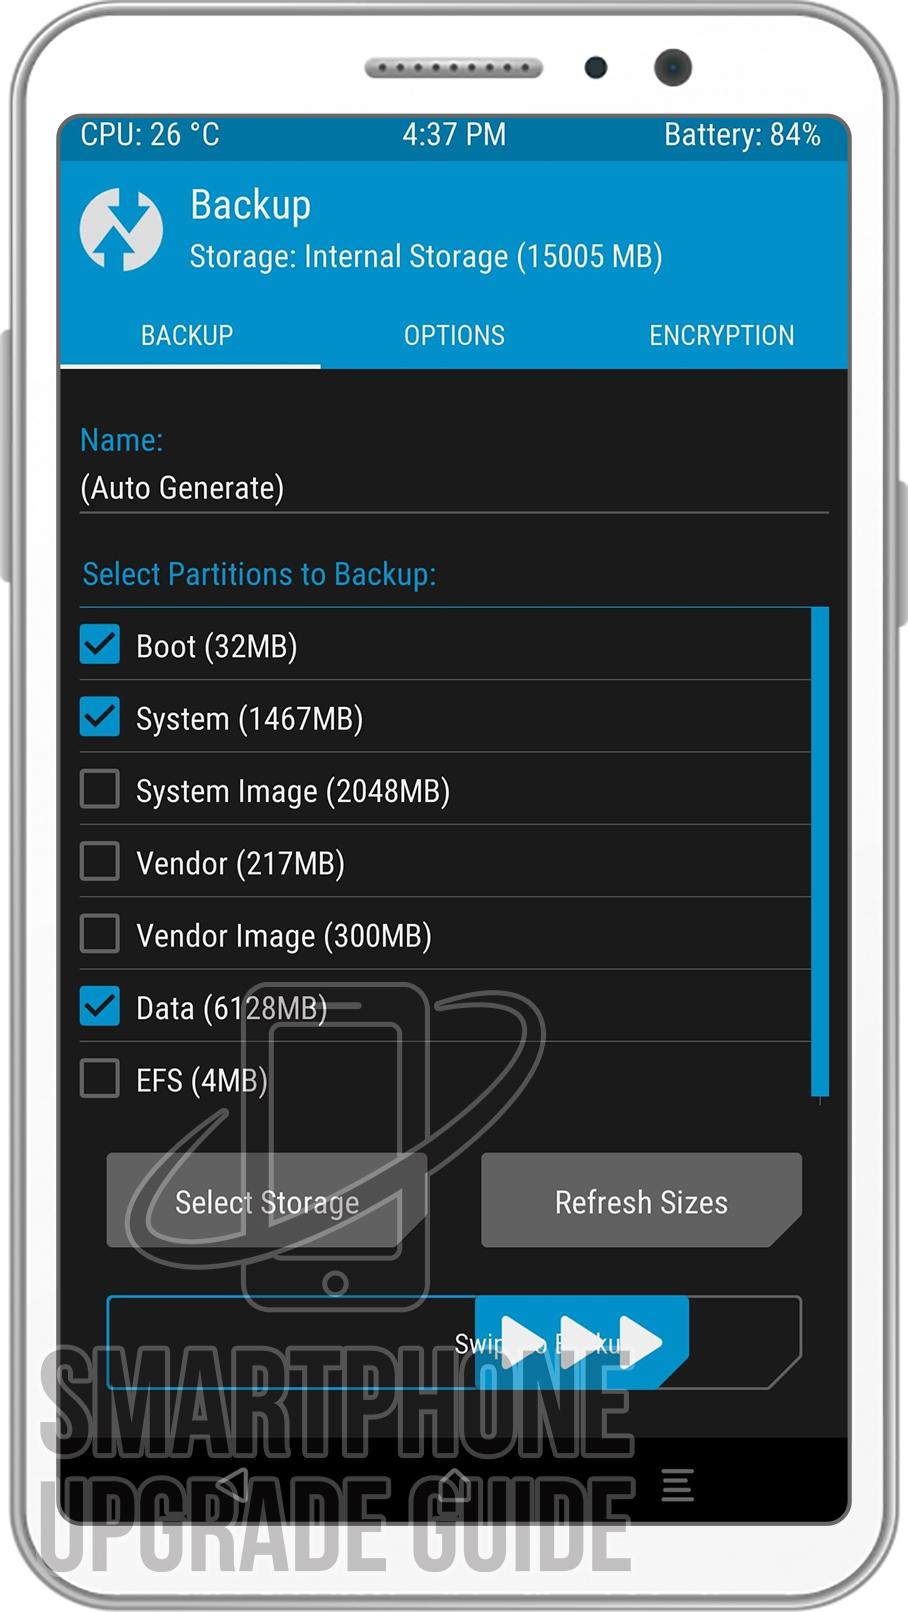
4. Now in TWRP create a Nandroid Backup of your device for safer side. If anything goes wrong, you can restore back to your older ROM. (How to Take Nandroid Backup)
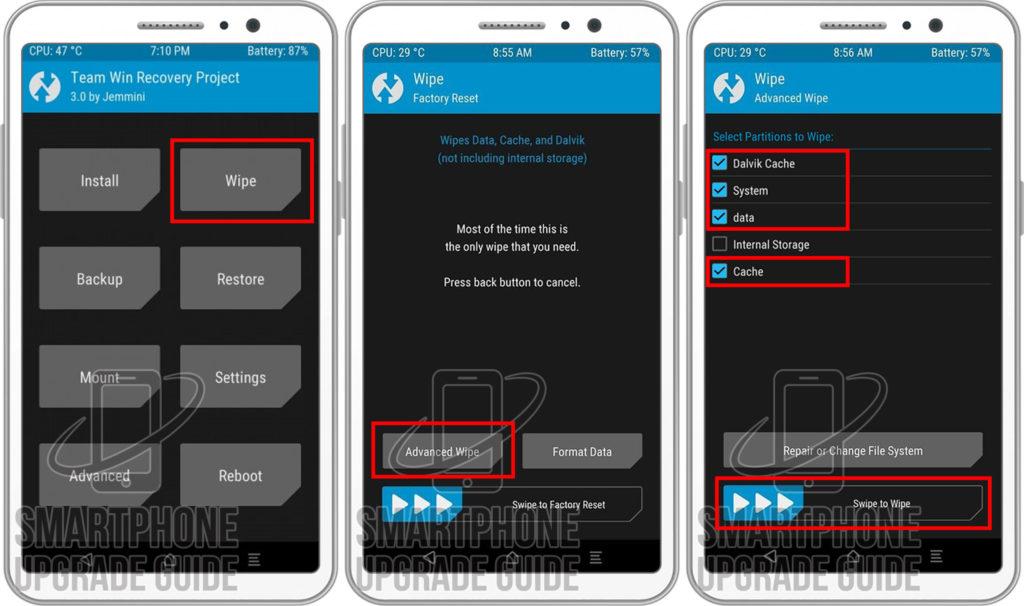
5. Now do a Factory Reset of your device, Goto Wipe > Advanced Wipe > Select Cache, Dalvik Cache, System, and Data. Then Swipe to Wipe.
6. Now go back to TWRP Main Menu by pressing the Center navigation button.
7. Now Select Install, Locate the ROM zip file and Swipe to Confirm Flash.
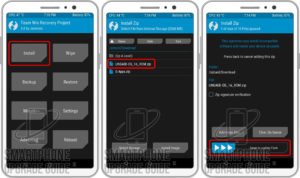
8. After the flashing completes, Flash the Gapps in the manner.

9. After Gapps flashing completes, Select Wipe cache/dalvik from the bottom left side of the screen, & Swipe to Wipe.
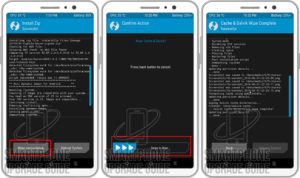
10. After wipe completes, Click on Reboot System.
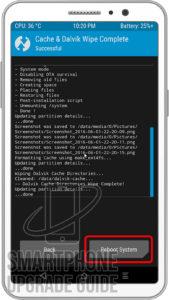
That’s it Now you have successfully installed the latest Android on your device, the first boot will take some time so please don’t panic!
If you have any questions regarding the ROM or the installation process, use the comments section below to reach us or contact XDA forum members from the link above.