

Pre-Requisites
Before we begin with this procedure, I would strongly recommend you create a backup of your device storage and all your files stored on your device. Moreover, it is advised to follow the steps mentioned in this post very carefully to avoid permanent damage or to brick your device.
Important Notes!
This ROM will only work on this device, Don’t try this on any other device.
Follow the steps correctly otherwise you may brick your device. We are not responsible for any damage to your phone.
It will erase all your data, so we advise you first to take a complete backup of your phone and then proceed.
Ensure that your phone has at least 50-60% charged to prevent the accidental shutdown in-between the process.
Requirements!
You must have TWRP Recovery Installed on your device. (Learn here: How to install)
XDA Development Forum: Here!(BlissRoms)
(☝Check this XDA Forum for Exact Details on how to Install this ROM also check if there’s a patch need to be flash)
▼DOWNLOAD FILES
Download AOSP(BlissRoms)
Download Recovery Image from Google Drive
Check out which G-App is compatible with your device from Here!
Installation instructions:
Download the latest build , GApps
Reboot to recovery
Wipe system , vendor , data , cache, internal storage.
Flash the latest build & GApps
Reboot
Instructions to Install
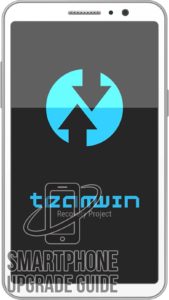
1. First Download & Install a Custom Recovery on your device (TWRP is recommended), If you already have installed then skip this step.
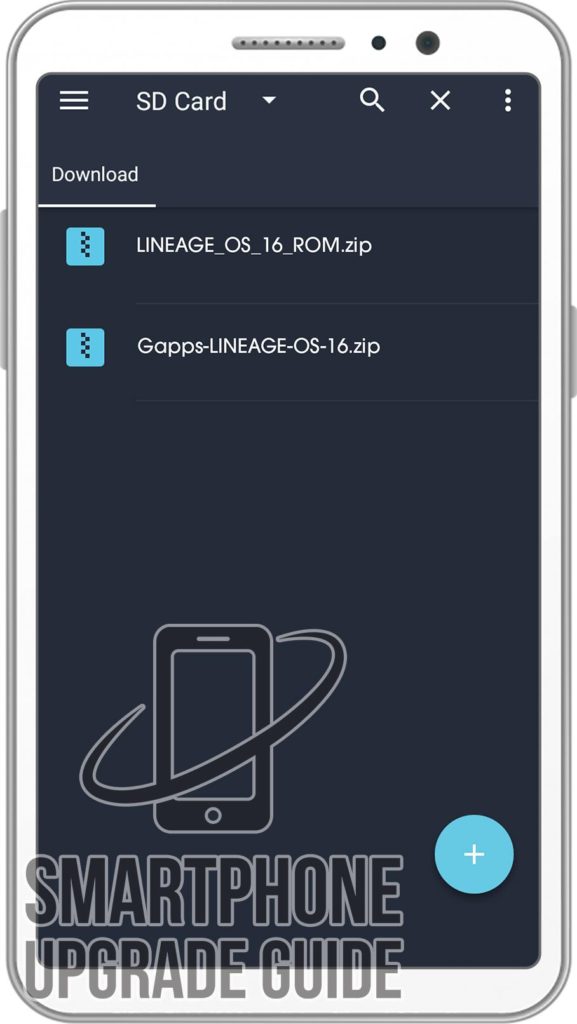
2. Download ROM & Gapps .zip file and save it on your device’s internal storage or SD Card.
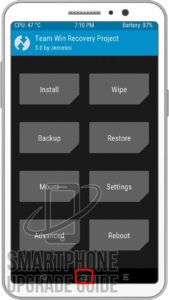
3. Now Boot your device into TWRP Recovery Mode. (if you don’t know how to boot your device into twrp recovery then you can search it on Google)
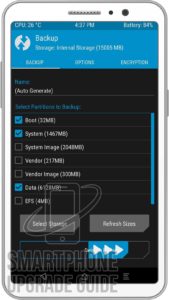
4. Now in TWRP create a Nandroid Backup of your device for safer side. If anything goes wrong, you can restore back to your older ROM. (How to Take Nandroid Backup)
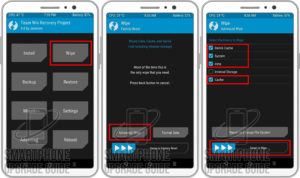
5. Now do a Factory Reset of your device, Goto Wipe > Advanced Wipe > Select Cache, Dalvik Cache, System, and Data. Then Swipe to Wipe.
6. Now go back to TWRP Main Menu by pressing the Center navigation button.
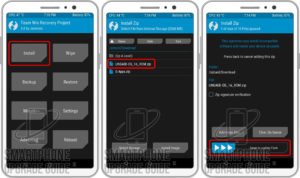
7. Now Select Install, Locate the ROM zip file and Swipe to Confirm Flash.
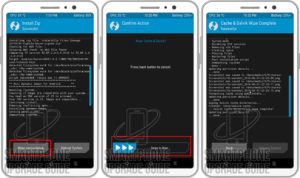
8. After the flashing completes, Flash the Gapps in the manner.

9. After Gapps flashing completes, Select Wipe cache/dalvik from the bottom left side of the screen, & Swipe to Wipe.
10. After wipe completes, Click on Reboot System.
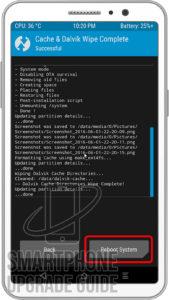
That’s it Now you have successfully installed the latest Android on your device, the first boot will take some time so please don’t panic!
If you have any questions regarding the ROM or the installation process, use the comments section below to reach us or contact to XDA forum members from the link above.