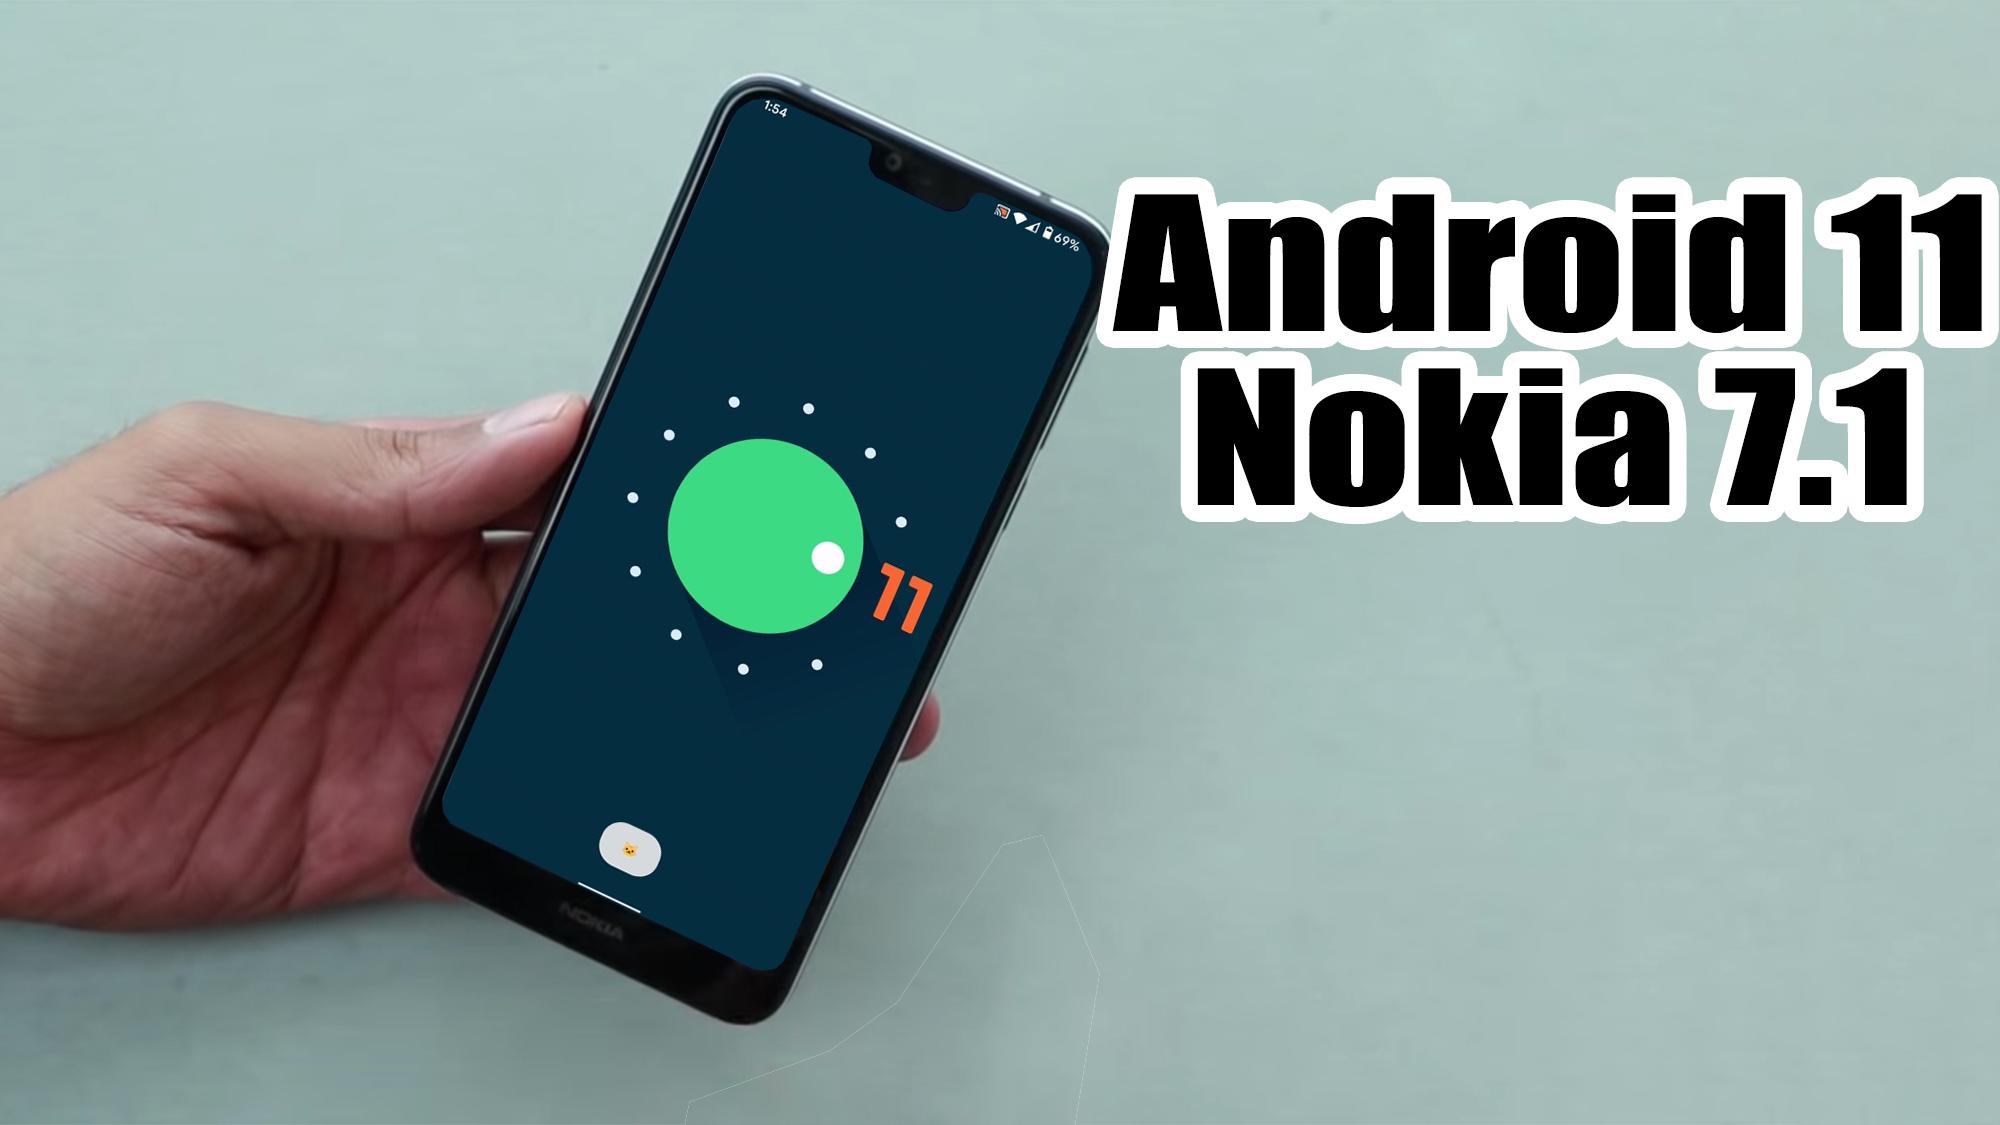
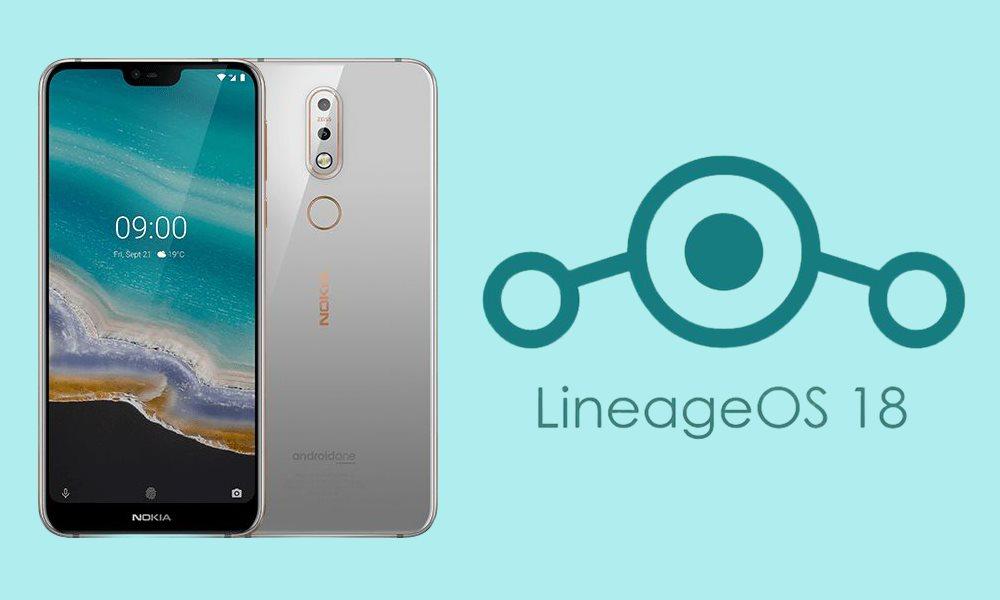
In this guide, we will show you how to install the LineageOS 18.0 on your Nokia 7.1 device. The OEM has a decent series of Android One devices lined up. Offering a clean stock Android OS coupled with faster updates, these devices manage to checkmark most of the requirements for everyday users. And Nokia 7.1 is a perfect example of the same. Along the same lines, its dual rear camera sporting the Zeiss optics manages to take impressive shots.
However, the device was launched with Android 8.1 Oreo out of the box. Since then, it has received its two promised upgrades and is currently on its last Android 10 update. But you could still welcome the latest Android 11 update on your device, albeit through a different route. Once you step into custom development, you could then flash the LineageOS 18.0 on your Nokia 7.1 device and get blessed with the latest iteration of Android. Here are the required instructions for the same.
Lineage OS 18 with Android 11 Features
Among all the custom ROMs available for our device, Lineage has been among the oldest player. In its early days, it was known as CyanogenMod and now this ‘lineage’ seems to have been rightly carried forward. Based on the Android Open Source Project, you will be able to welcome a few handy customization options to your device. The ROM isn’t known to offer a plethora of features, rather it maintains an equilibrium with the stability front.
As far as the latest LineageOS 18 is concerned, it is based on the latest Android 11 that has just been released. This in turn translates to the user getting blessed with some noteworthy features. These include a separate Conversation section, OneTime Permissions, and the new Notification History. Likewise, there has been the introduction of Chat Bubbles and a native Screen Recorder. The Media Player has now also been moved to the Quick Settings with some handy Media Controls options.
Important Notes!
1. This ROM will only work on this device, Don’t try this on any other device.
2. Follow the steps correctly otherwise you may brick your device. We are not responsible for any damage to your phone.
3. It will erase all your data, so we advise you first to take a complete backup of your phone and then proceed.
4. Ensure that your phone has at least 50-60% charged to prevent the accidental shutdown in-between the process.
Requirements!
You must have TWRP Recovery Installed on your device.
(Learn here: How to install)
XDA Development Forum: Here!
(you can check here more information about ROM what is working and what’s not working)
▼ DOWNLOAD FILES ▼
LINEAGE OS 18 ROM
BiTGapps 11 GAPPS / NIKGAPPS 11
(Check-out which G-App is compatible for your device from Here!)
Instructions to Install
1. First Download & Install a Custom Recovery on your device (TWRP is recommended), If you already have installed then skip this step.
2. Download ROM & Gapps .zip file and save it on your device’s Internal storage or SD Card.

3. Now Boot your device into TWRP Recovery Mode. (if you don’t know how to boot your device into TWRP Recovery then you can search it on Google)

4. Now in TWRP create a Nandroid Backup of your device for safer side. If anything goes wrong, you can restore back to your older ROM. (How to Take Nandroid Backup)

5. Now do a Factory Reset of your device, Goto Wipe > Advanced Wipe > Select Cache, Dalvik Cache, System, and Data. Then Swipe to Wipe.
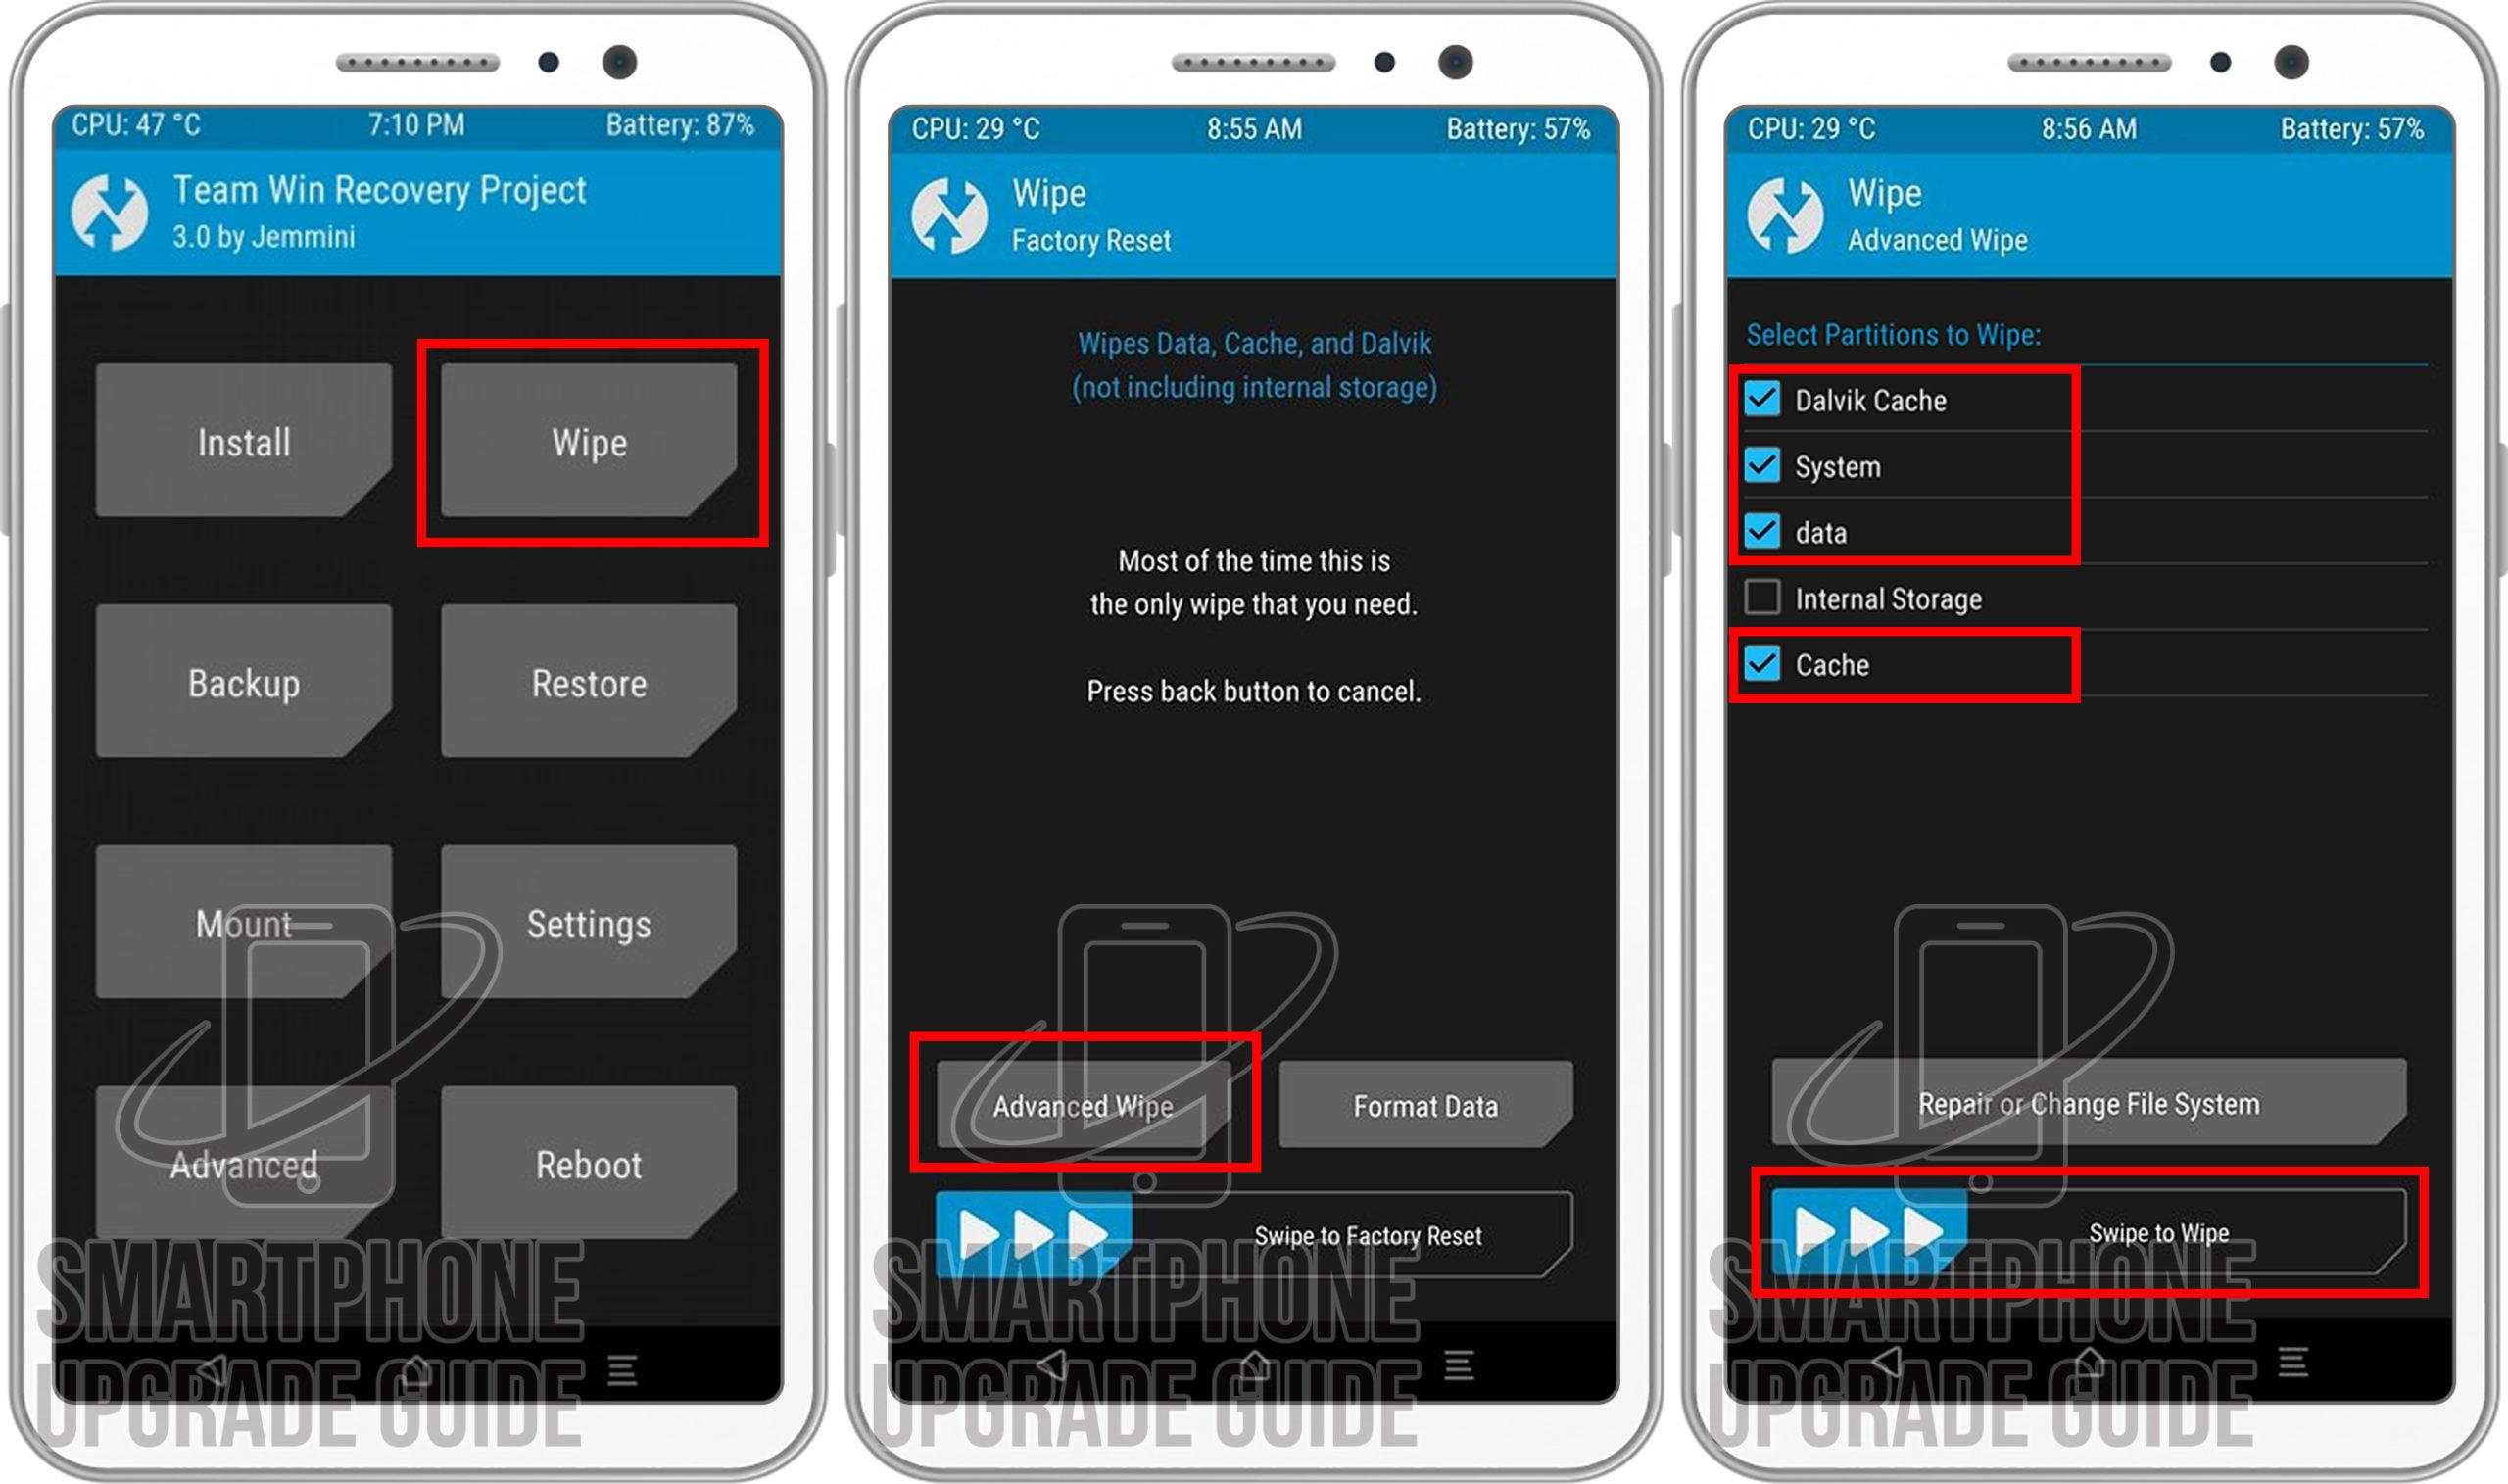
6. Now go back to TWRP Main Menu by pressing the Center navigation button.

7. Now Select Install, Locate the ROM zip file and Swipe to Confirm Flash.
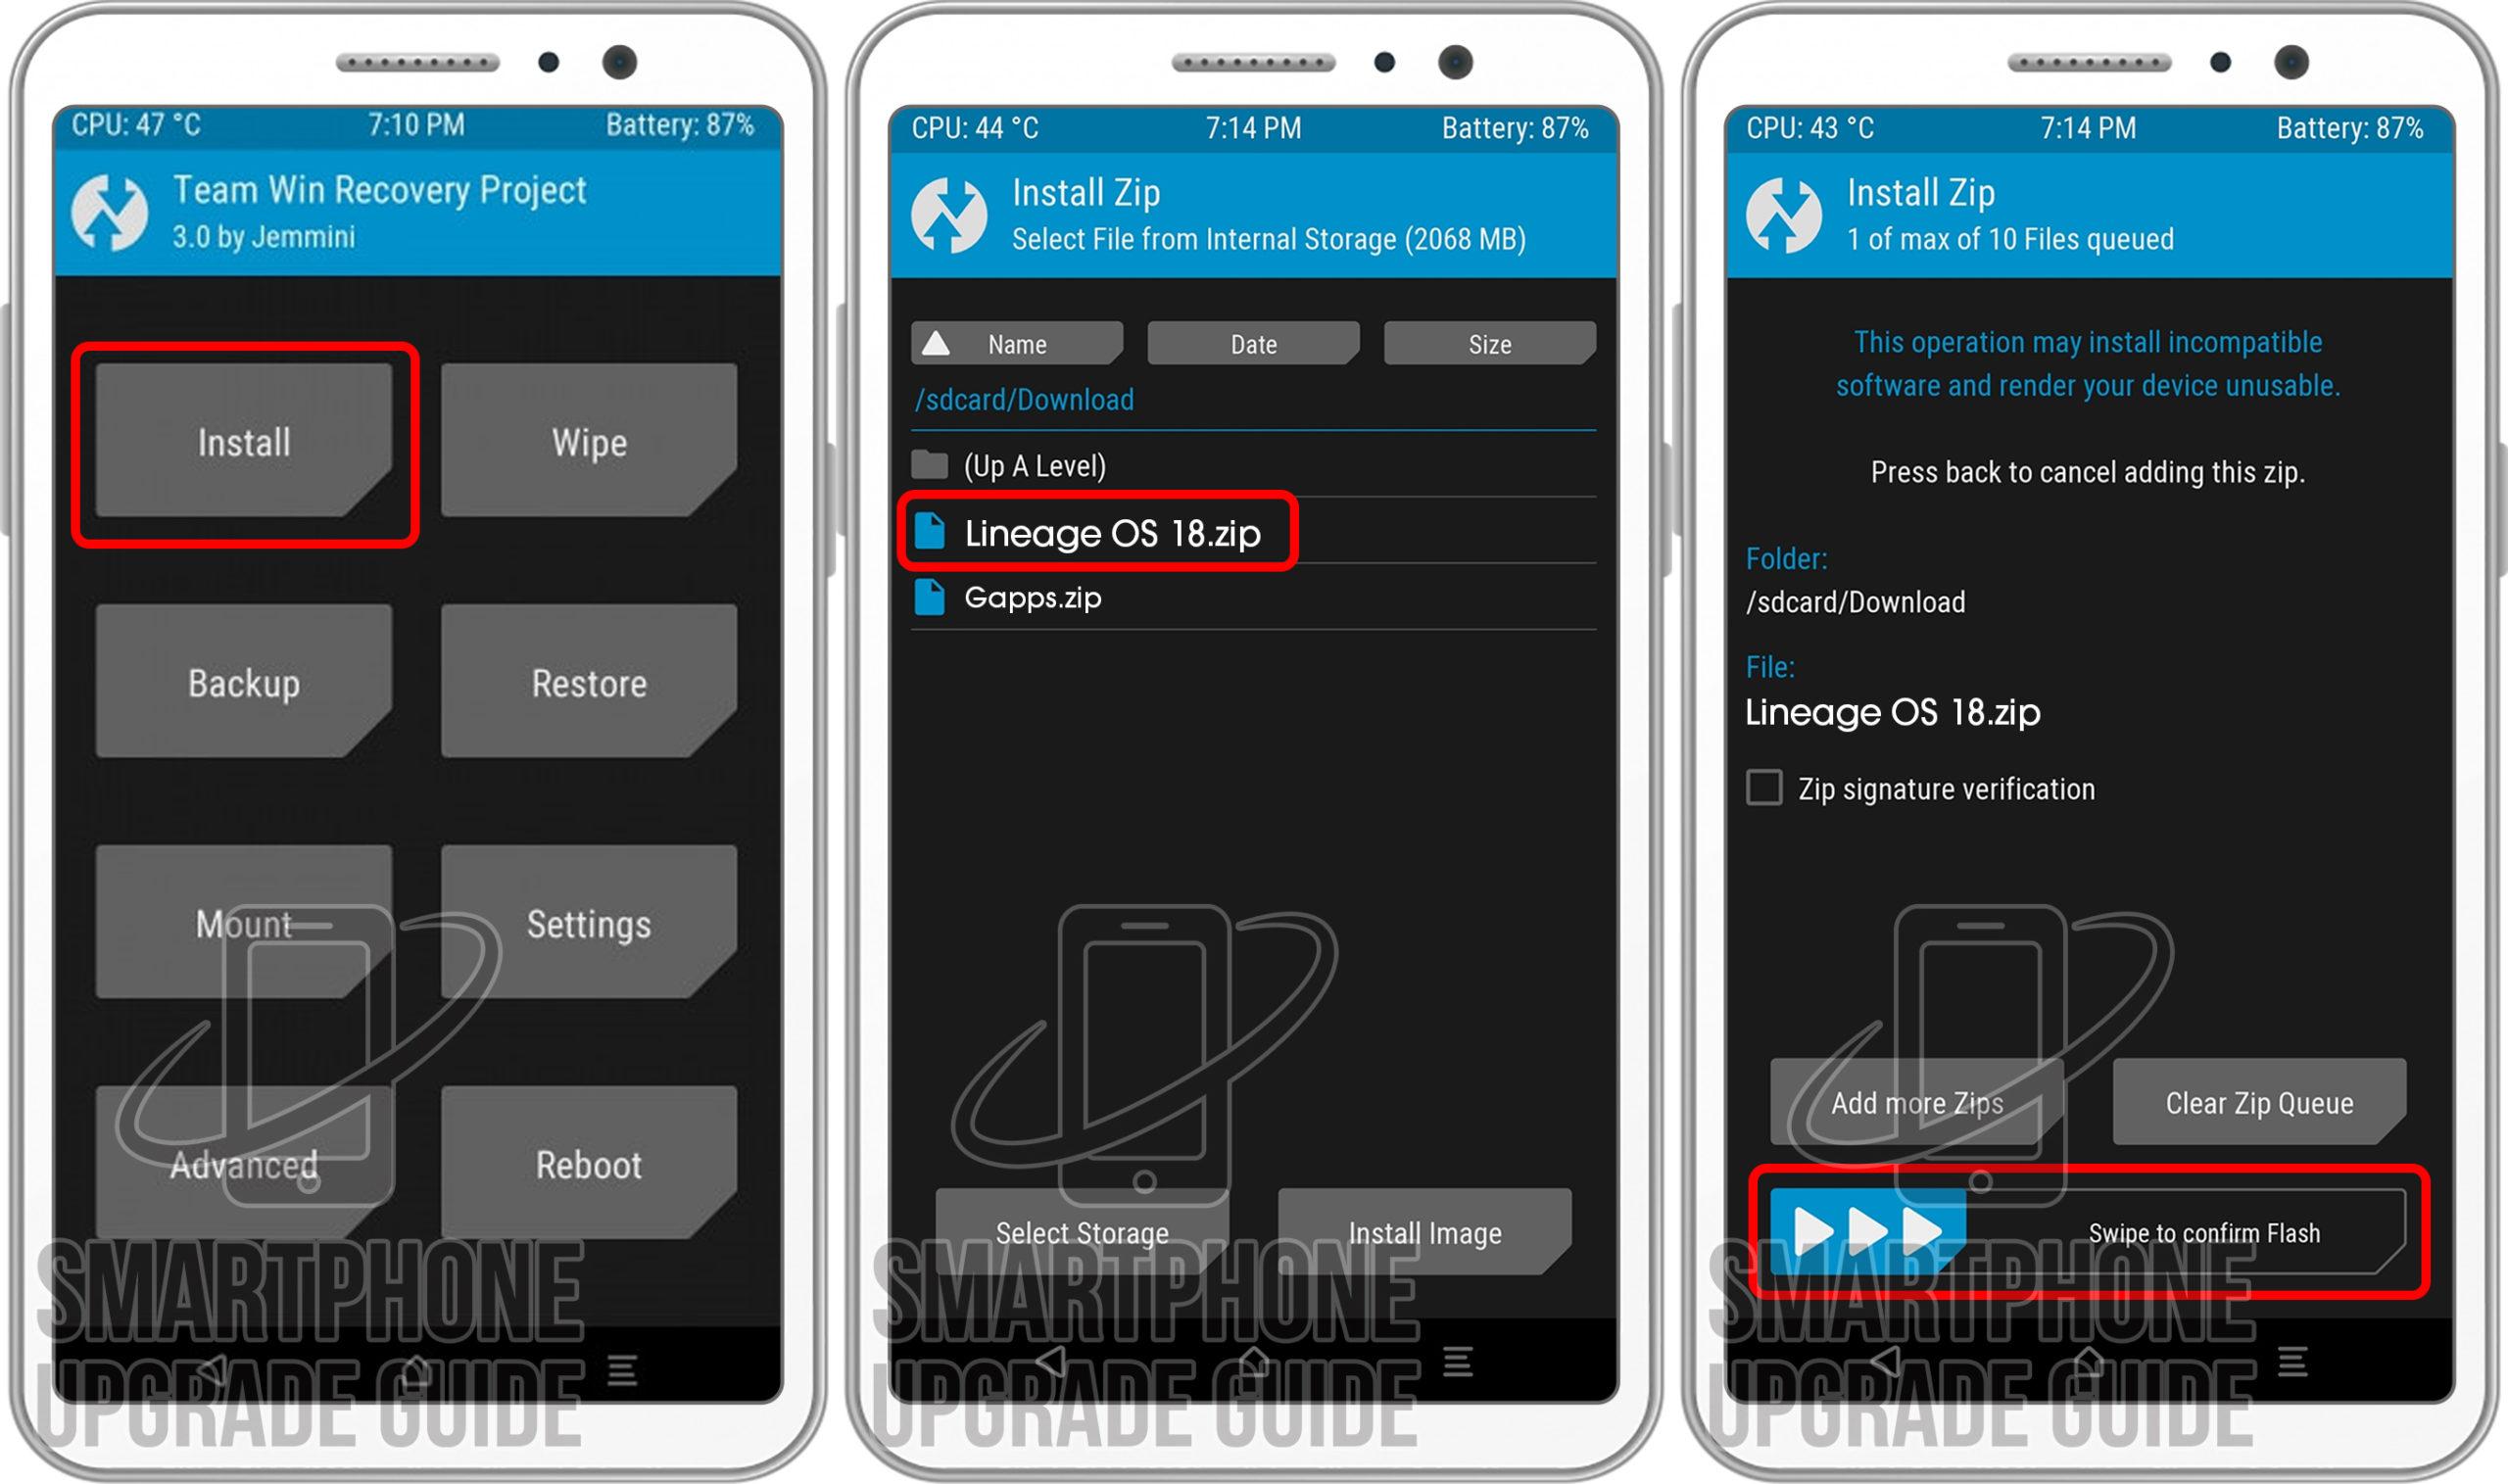
8. After the flashing completes, Flash the GApps in the manner.
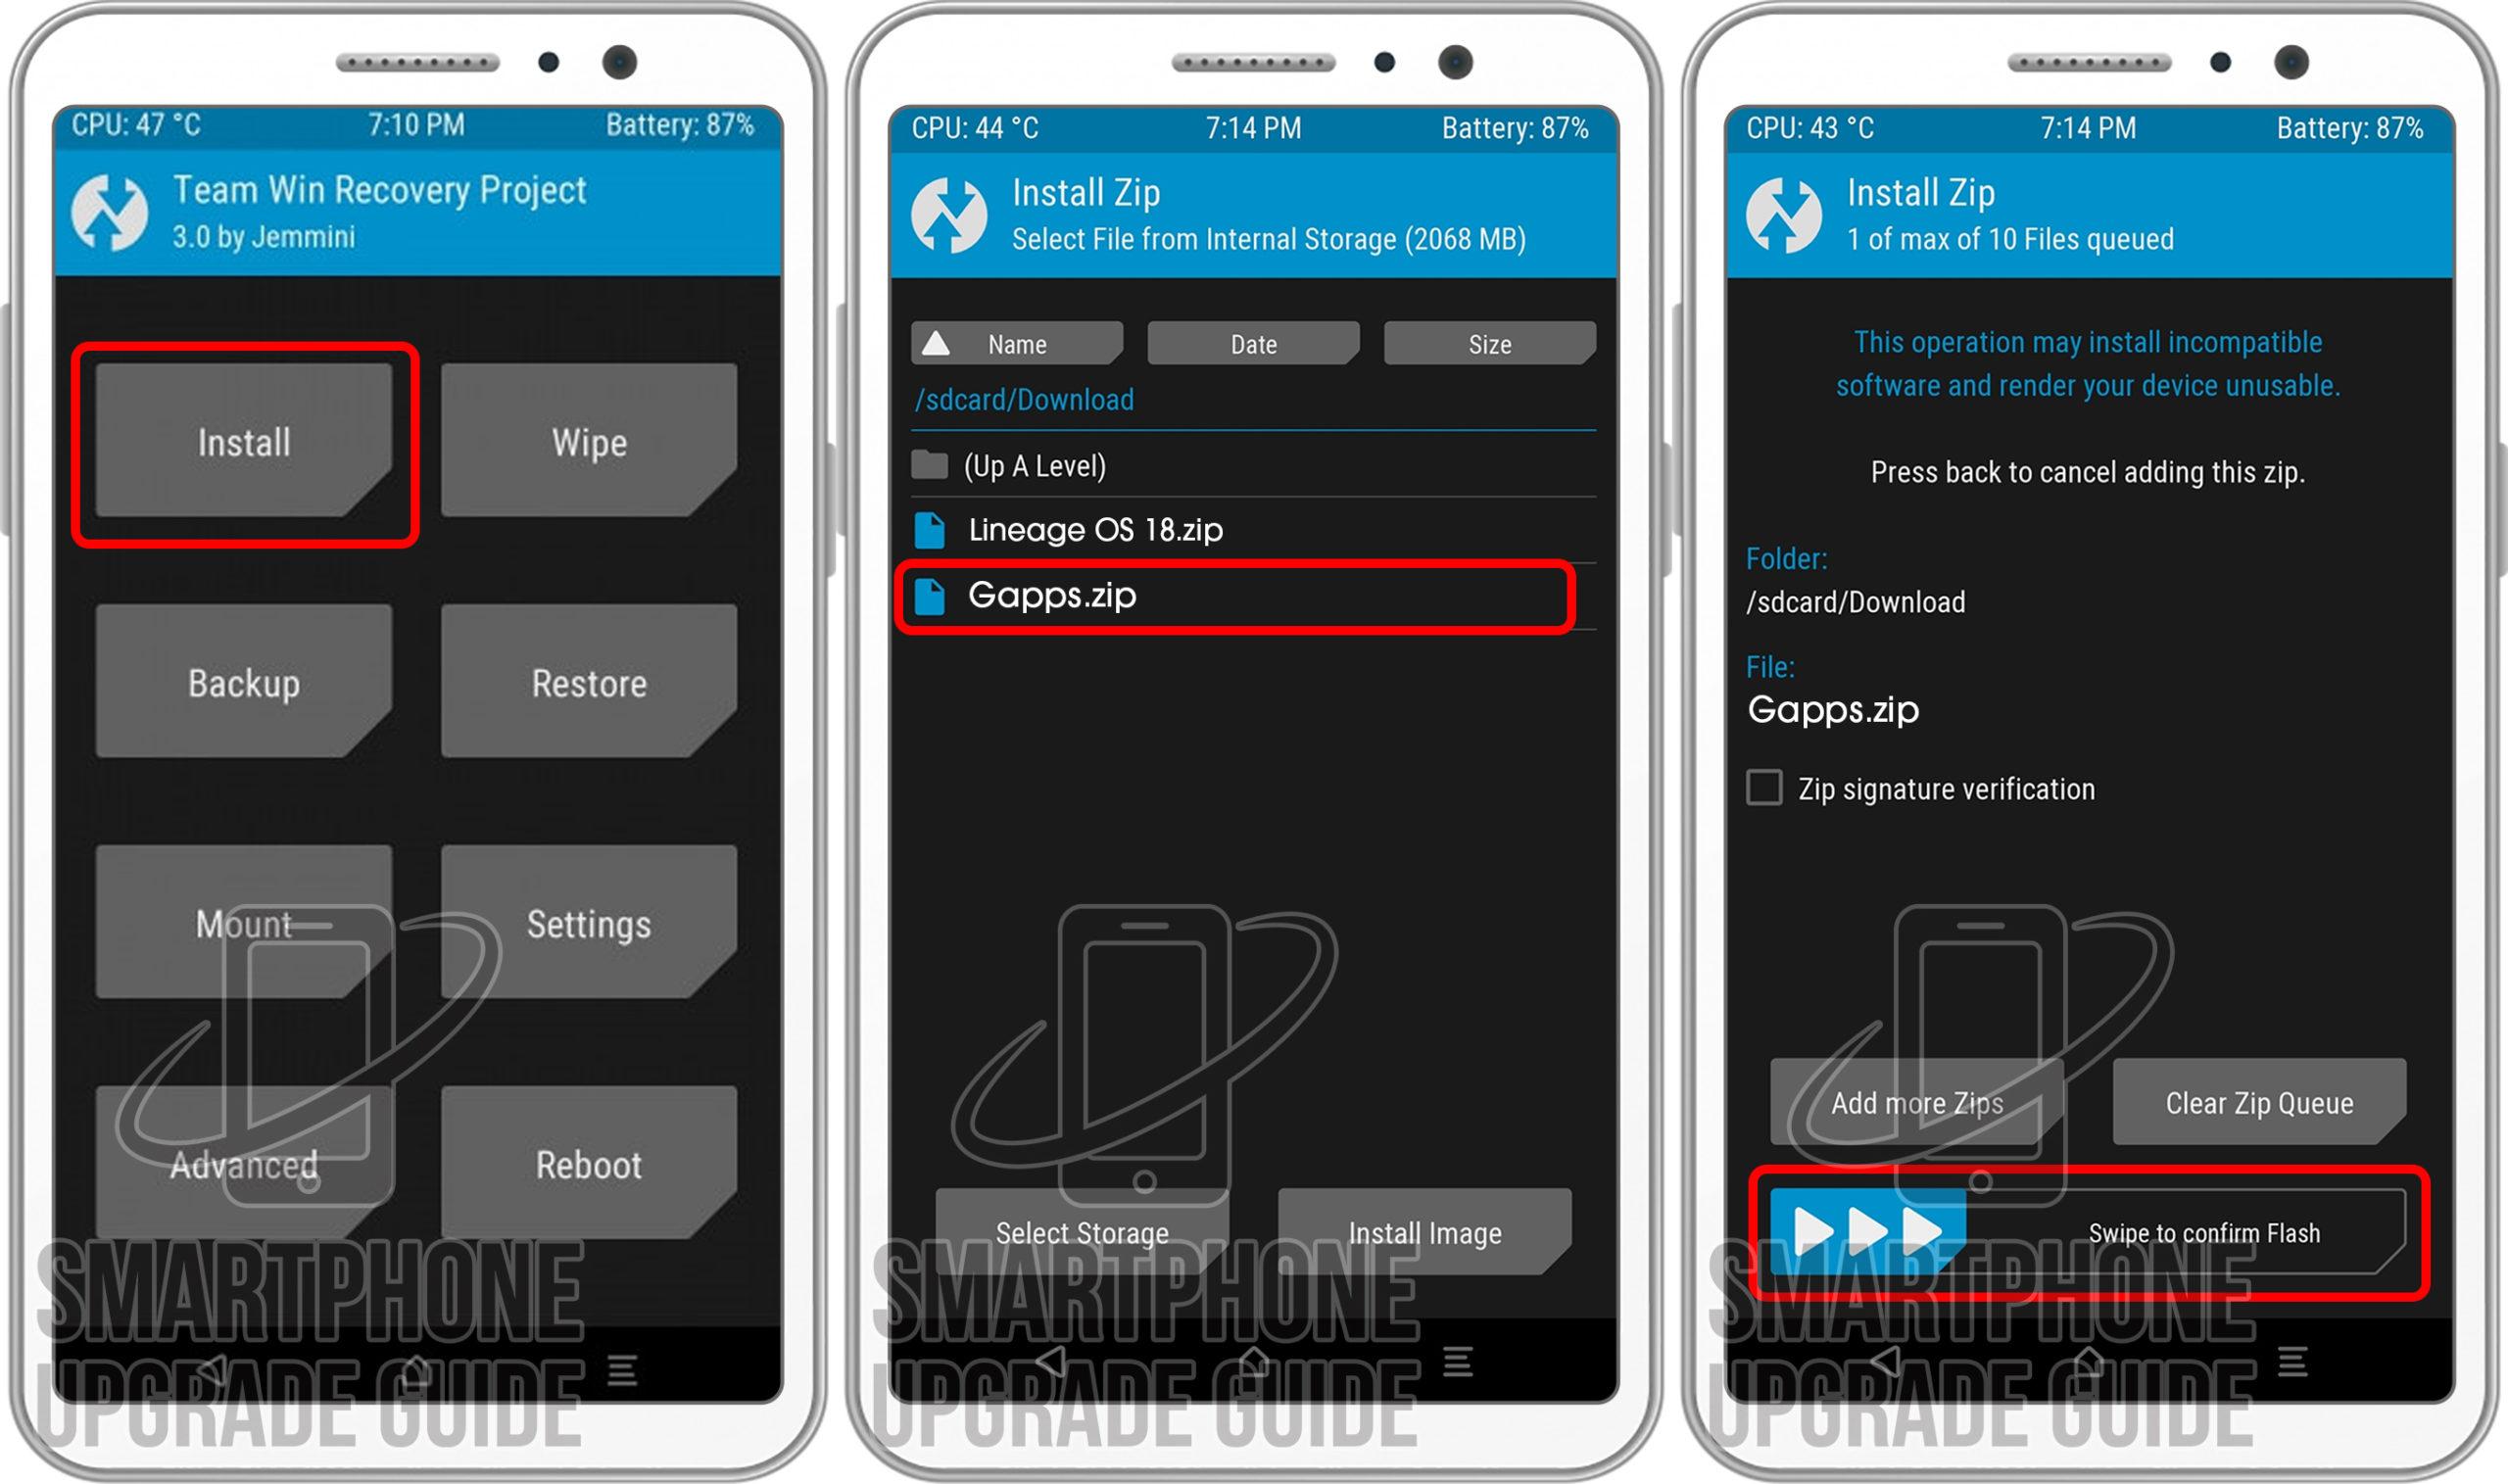
9. After GApps flashing completes, Select Wipe cache/Dalvik from the bottom left side of the screen, & Swipe to Wipe.
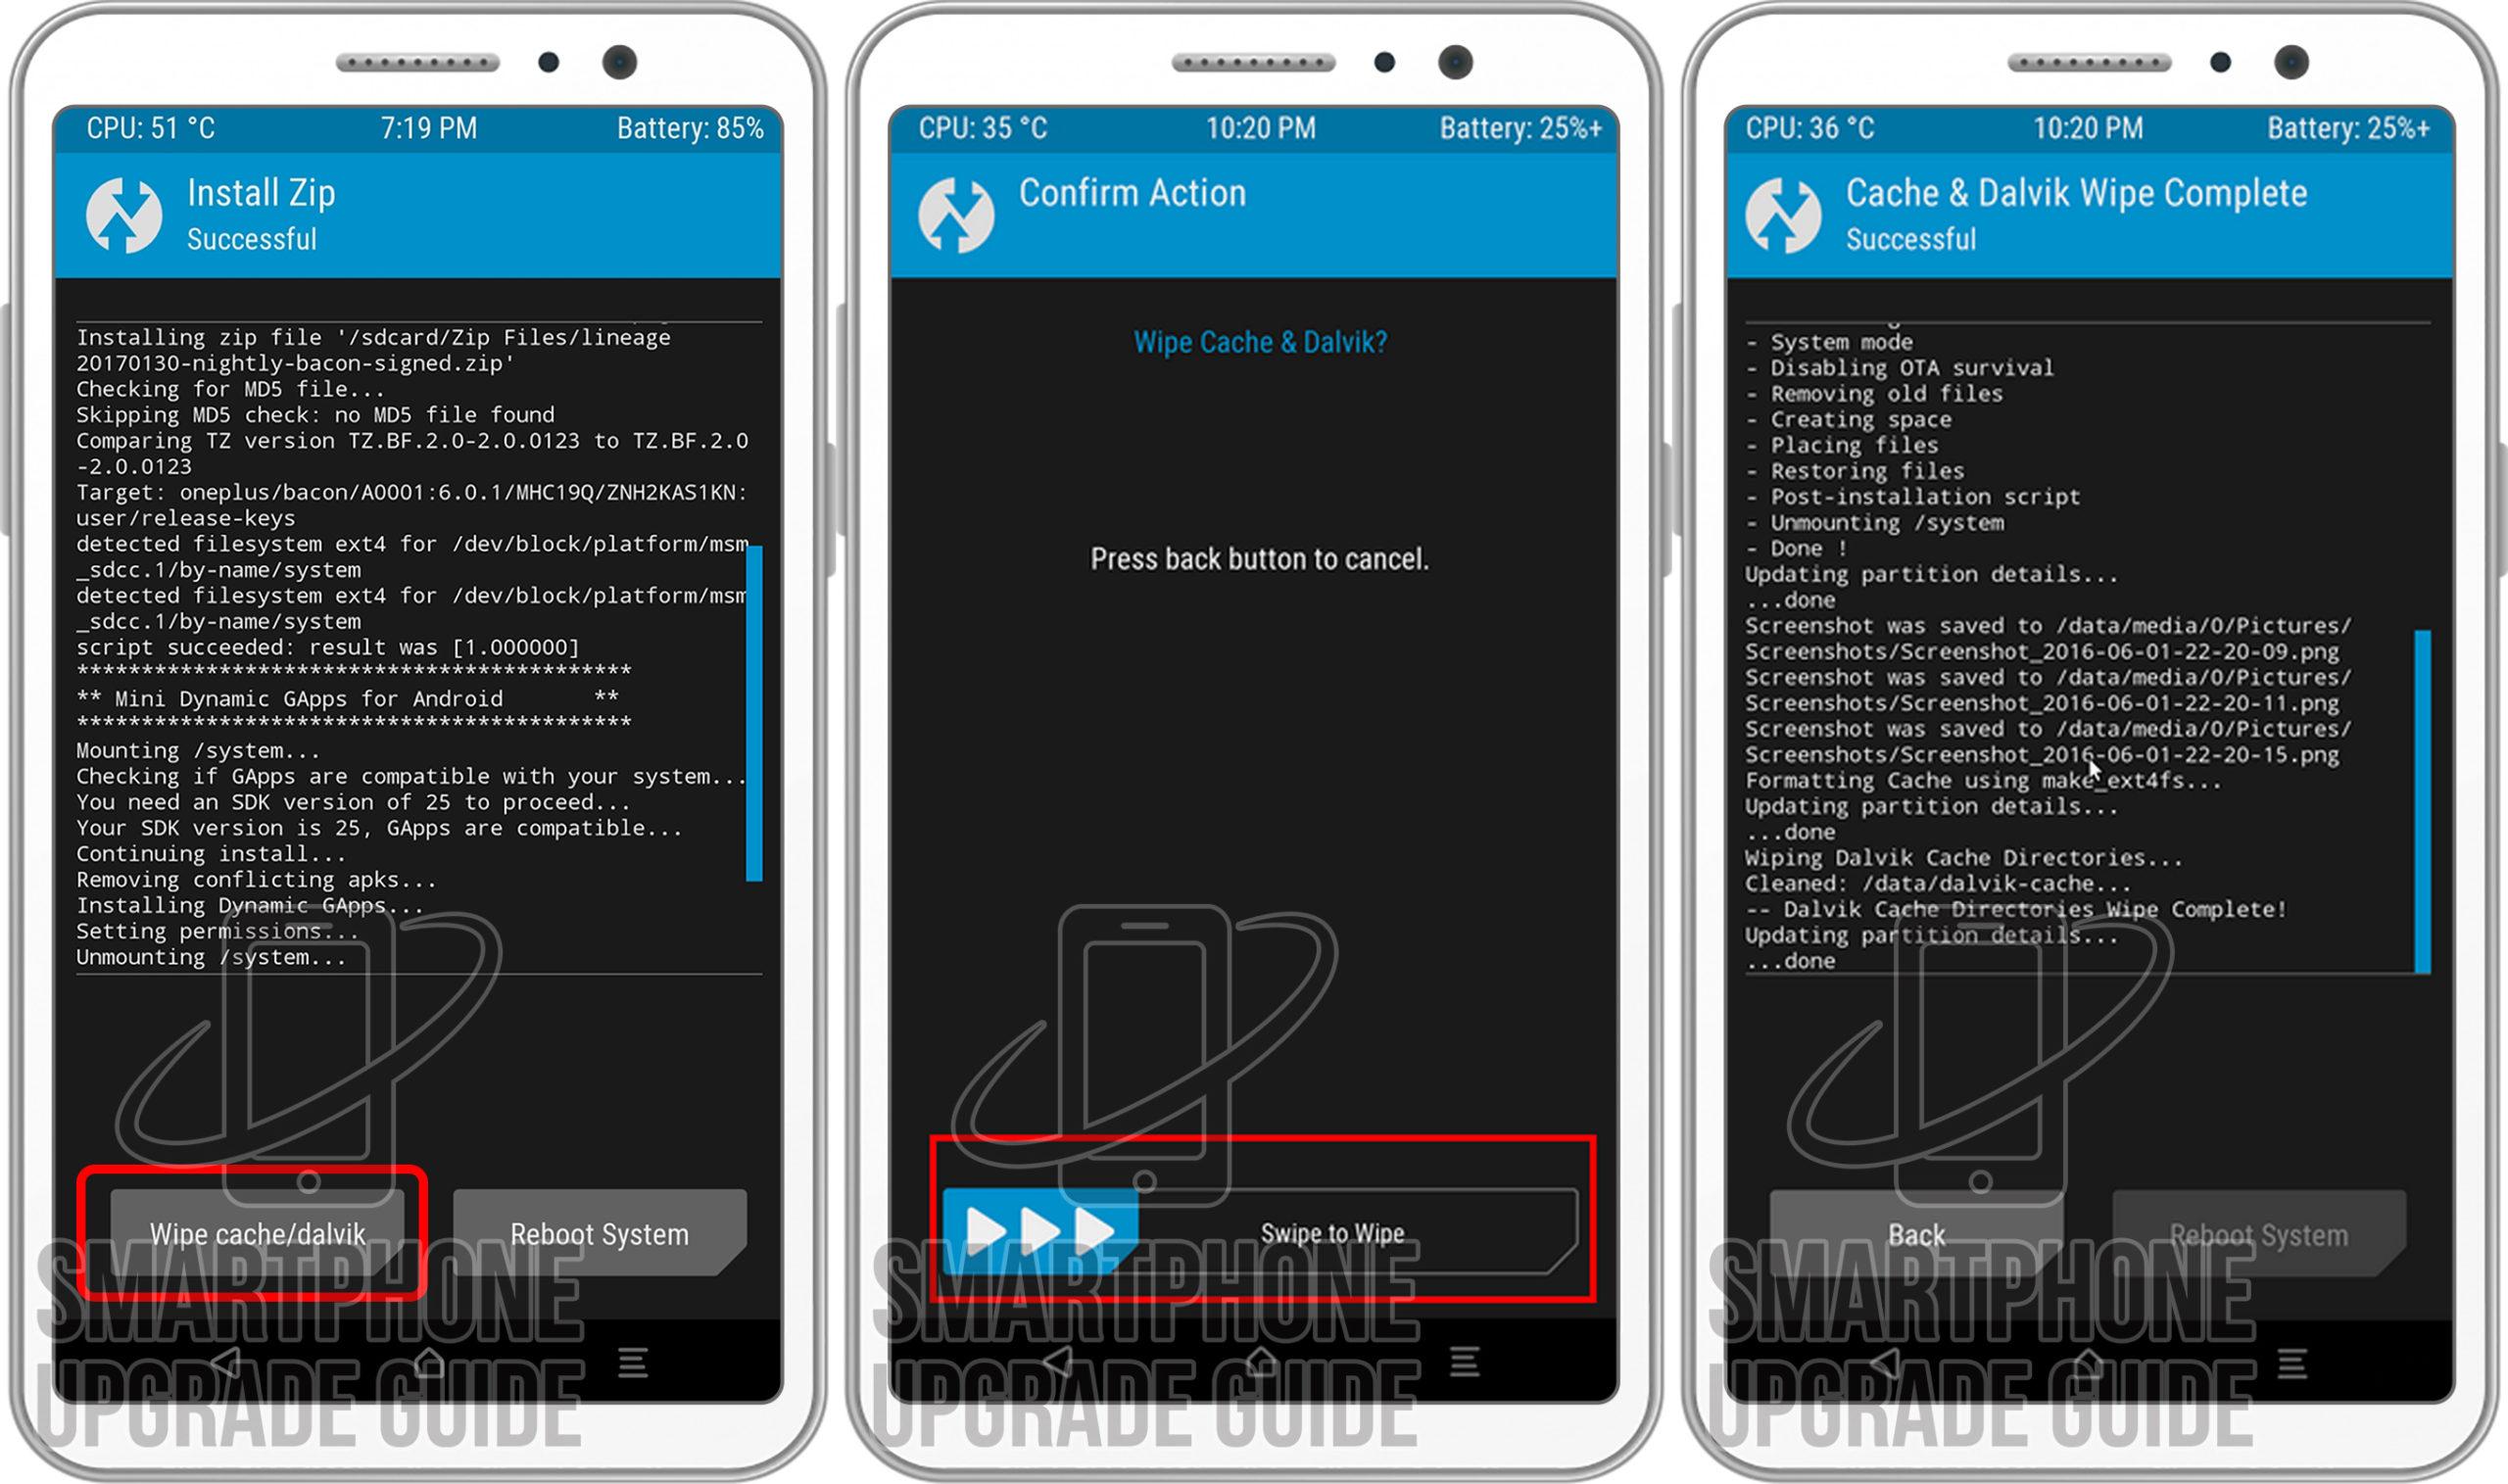
10. After wipe completes, Click on Reboot System.

That’s it Now you have successfully installed the latest Android on your device, the first boot will take some time so please don’t panic!
If you have any questions regarding the ROM or the installation process, use the comments section below to reach us or contact to XDA forum members from the link above.
