A custom recovery is one of the most powerful tools available to Android enthusiasts. You can flash ZIPs that modify your device in ways even root access can’t achieve, and use it to install custom ROMs. But when applying mods, there’s always a chance something could go wrong — including bricking your device.
With TWRP recovery, the NANDroid backup feature ensures you’re never without a safety net. Once you create a backup, you’ll always have a restore point that brings your apps, settings, and system back to a fully working state. Every custom recovery user should do this — here’s exactly how.
Part 1: Creating a NANDroid Backup
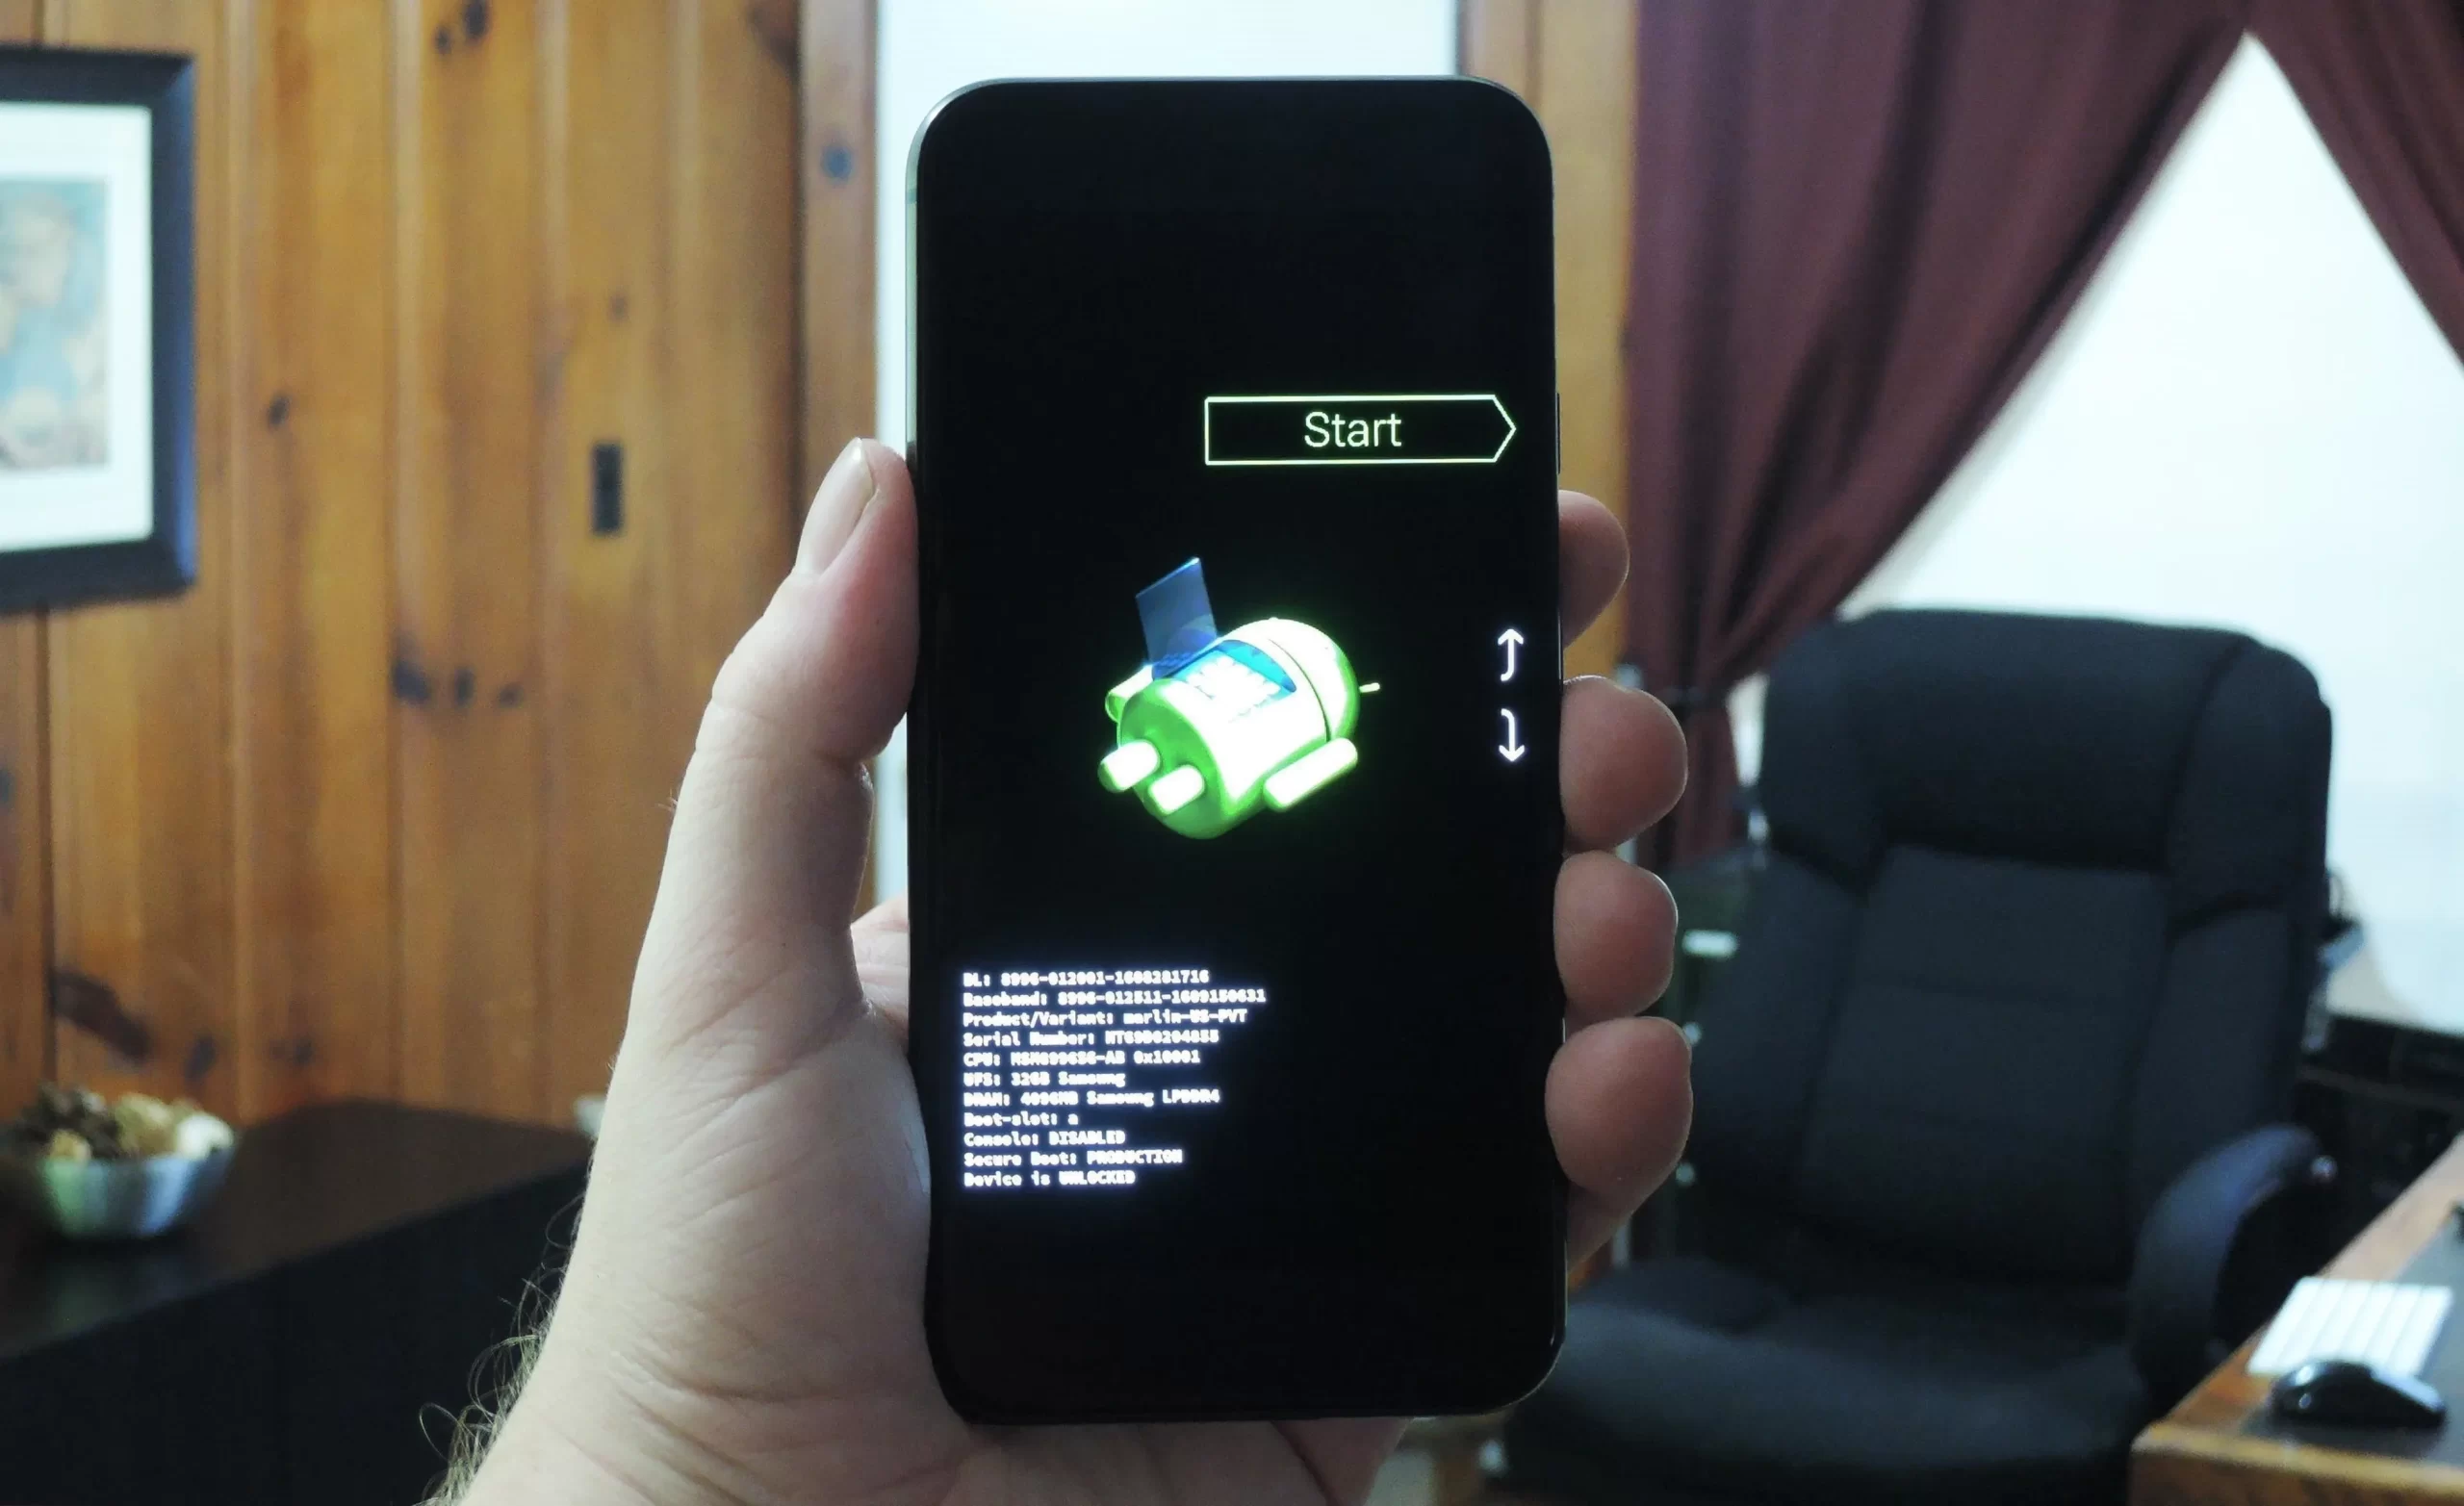
Start by booting your phone into TWRP. The method varies by device — for most Android phones, power the device completely off, then press and hold the Volume Down + Power buttons simultaneously until the bootloader appears.
Once inside TWRP, follow these steps to create your NANDroid backup:
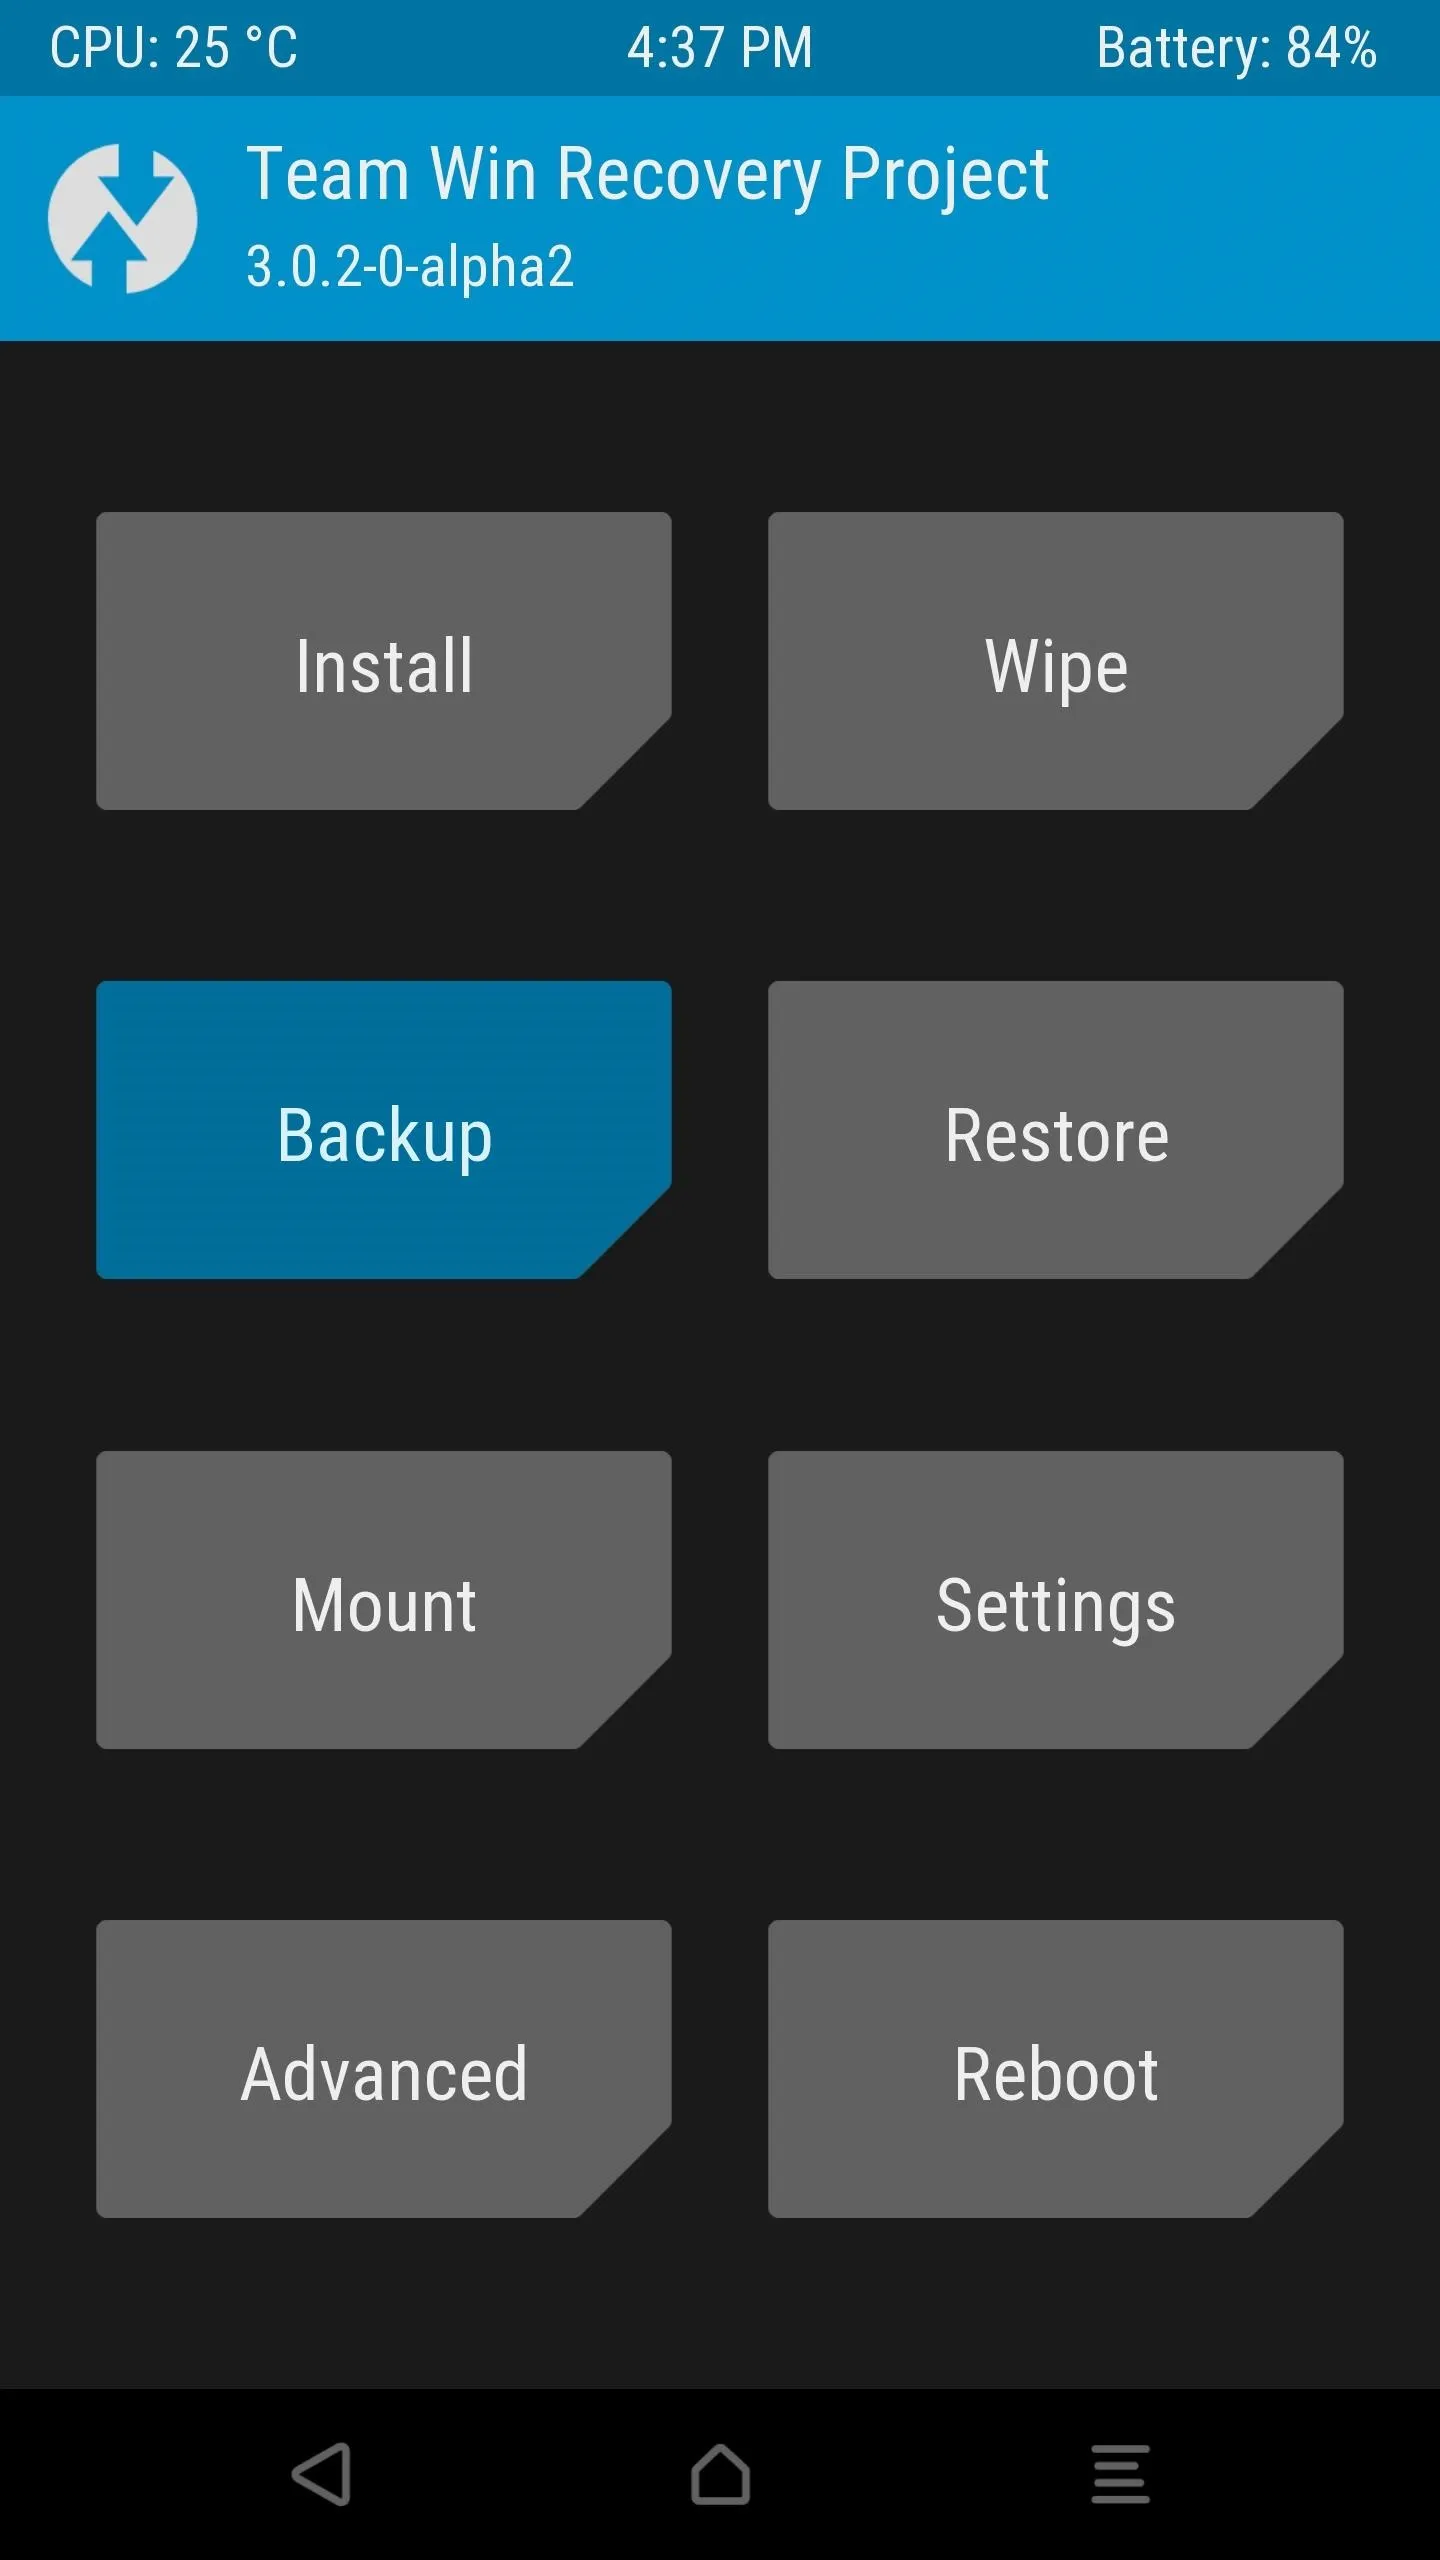
- From the TWRP home screen, tap the “Backup” button.
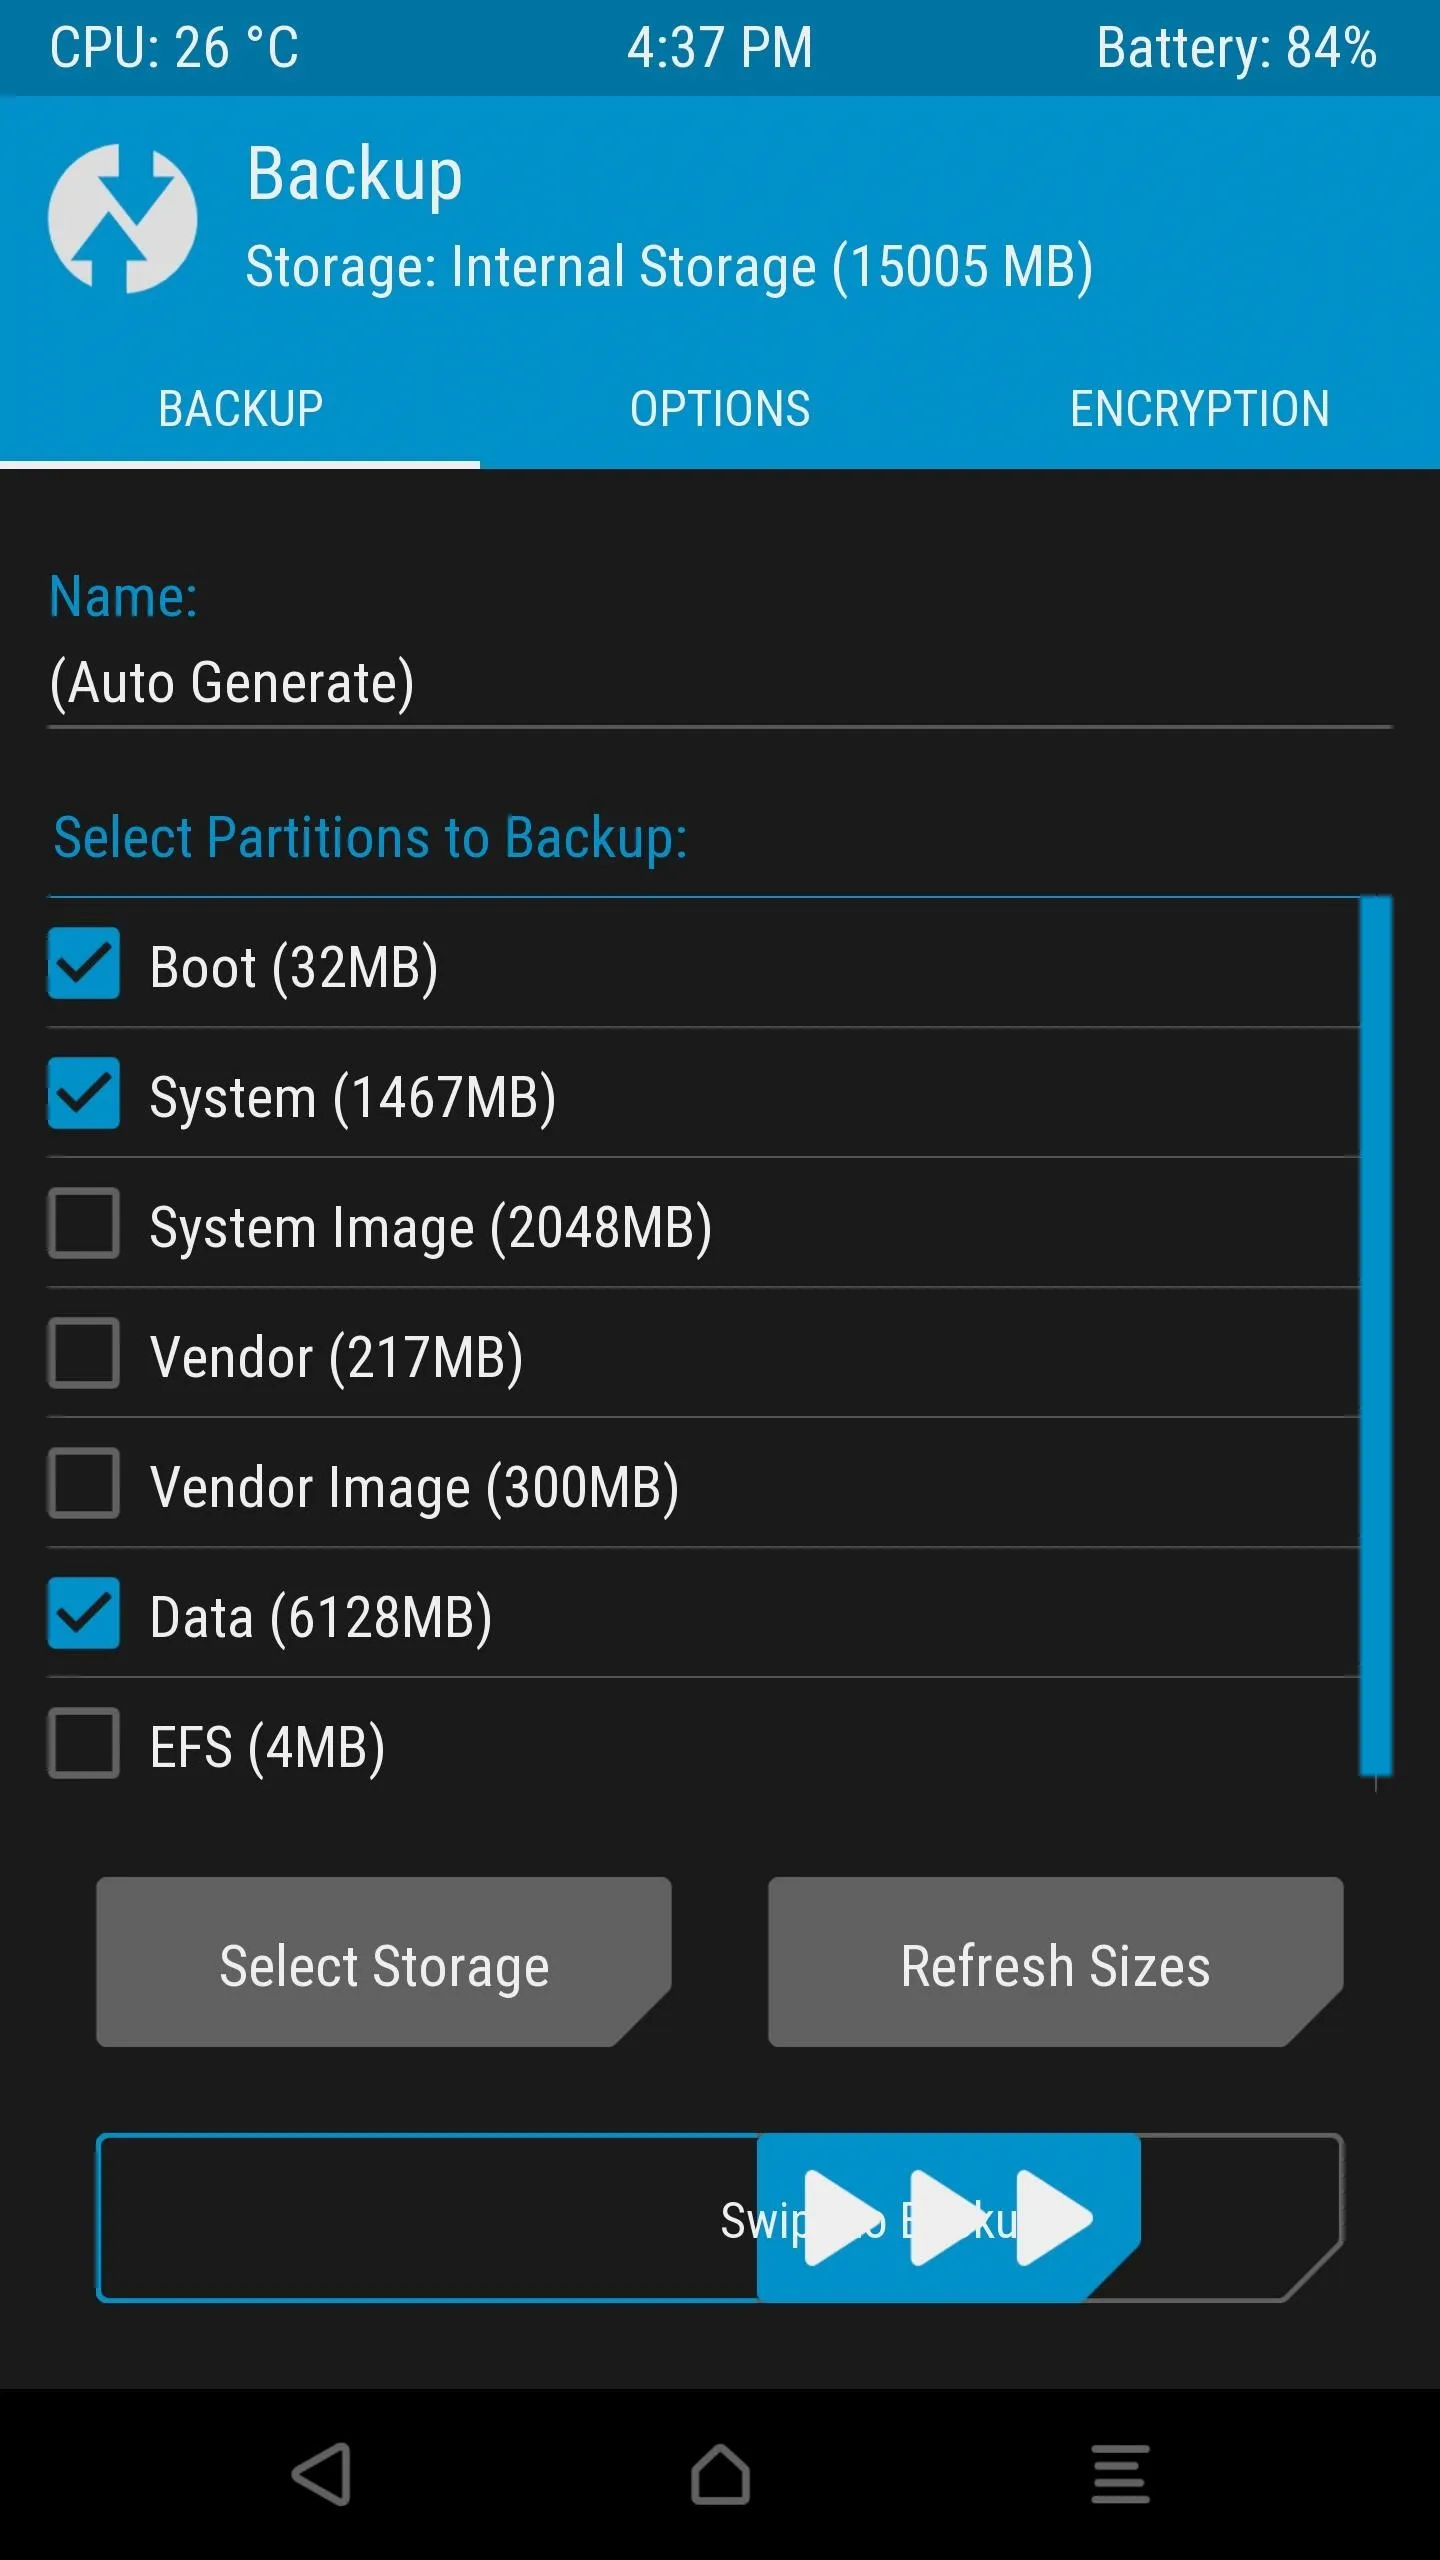
- On the backup screen, ensure Boot, System, and Data are all checked.
 TWRP home screen — tap “Backup”Select Boot, System, and Data
 - Swipe the slider at the bottom of the screen to start the backup. This can take up to 15 minutes.Swipe the slider at the bottom to start the backup
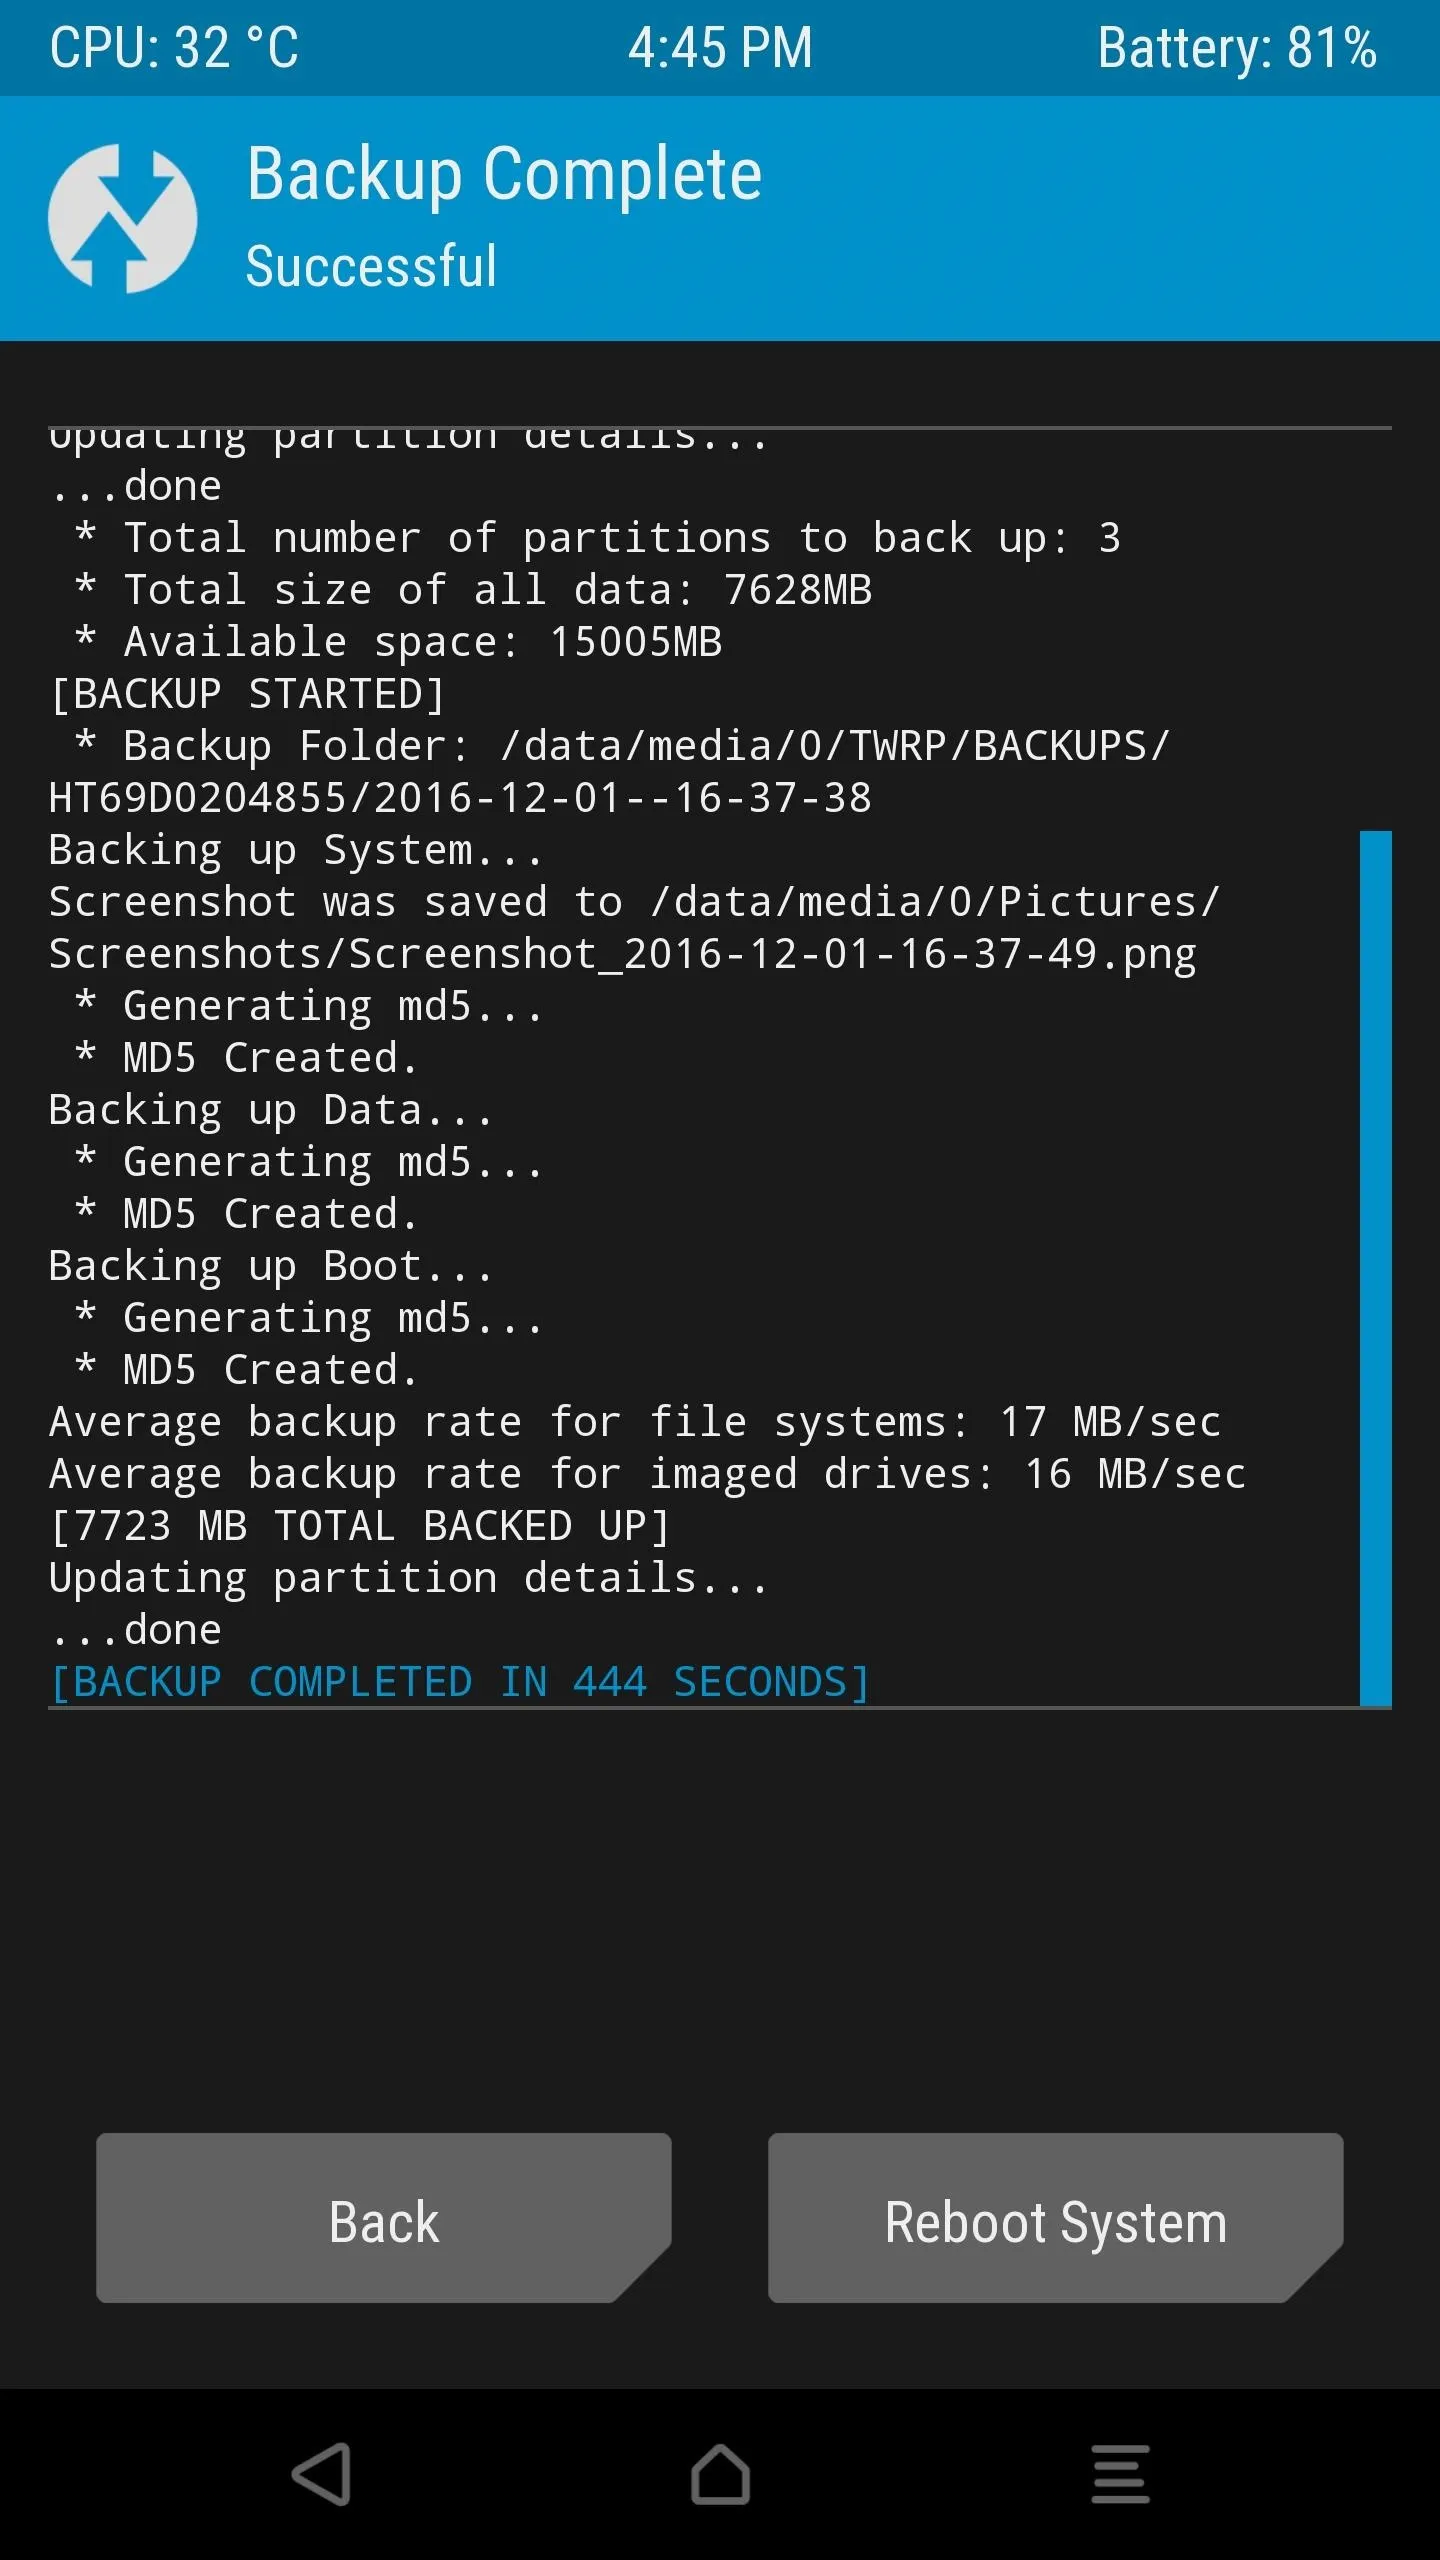
- When complete, tap “Reboot System” to return to Android.Backup complete — tap Reboot System
Part 2: Restoring a NANDroid Backup
If a mod or ROM installation causes problems, your NANDroid backup is your escape hatch. Restoring it rolls back every app, setting, and system file to exactly how things were when you made the backup.
To restore, boot into TWRP and follow these steps:
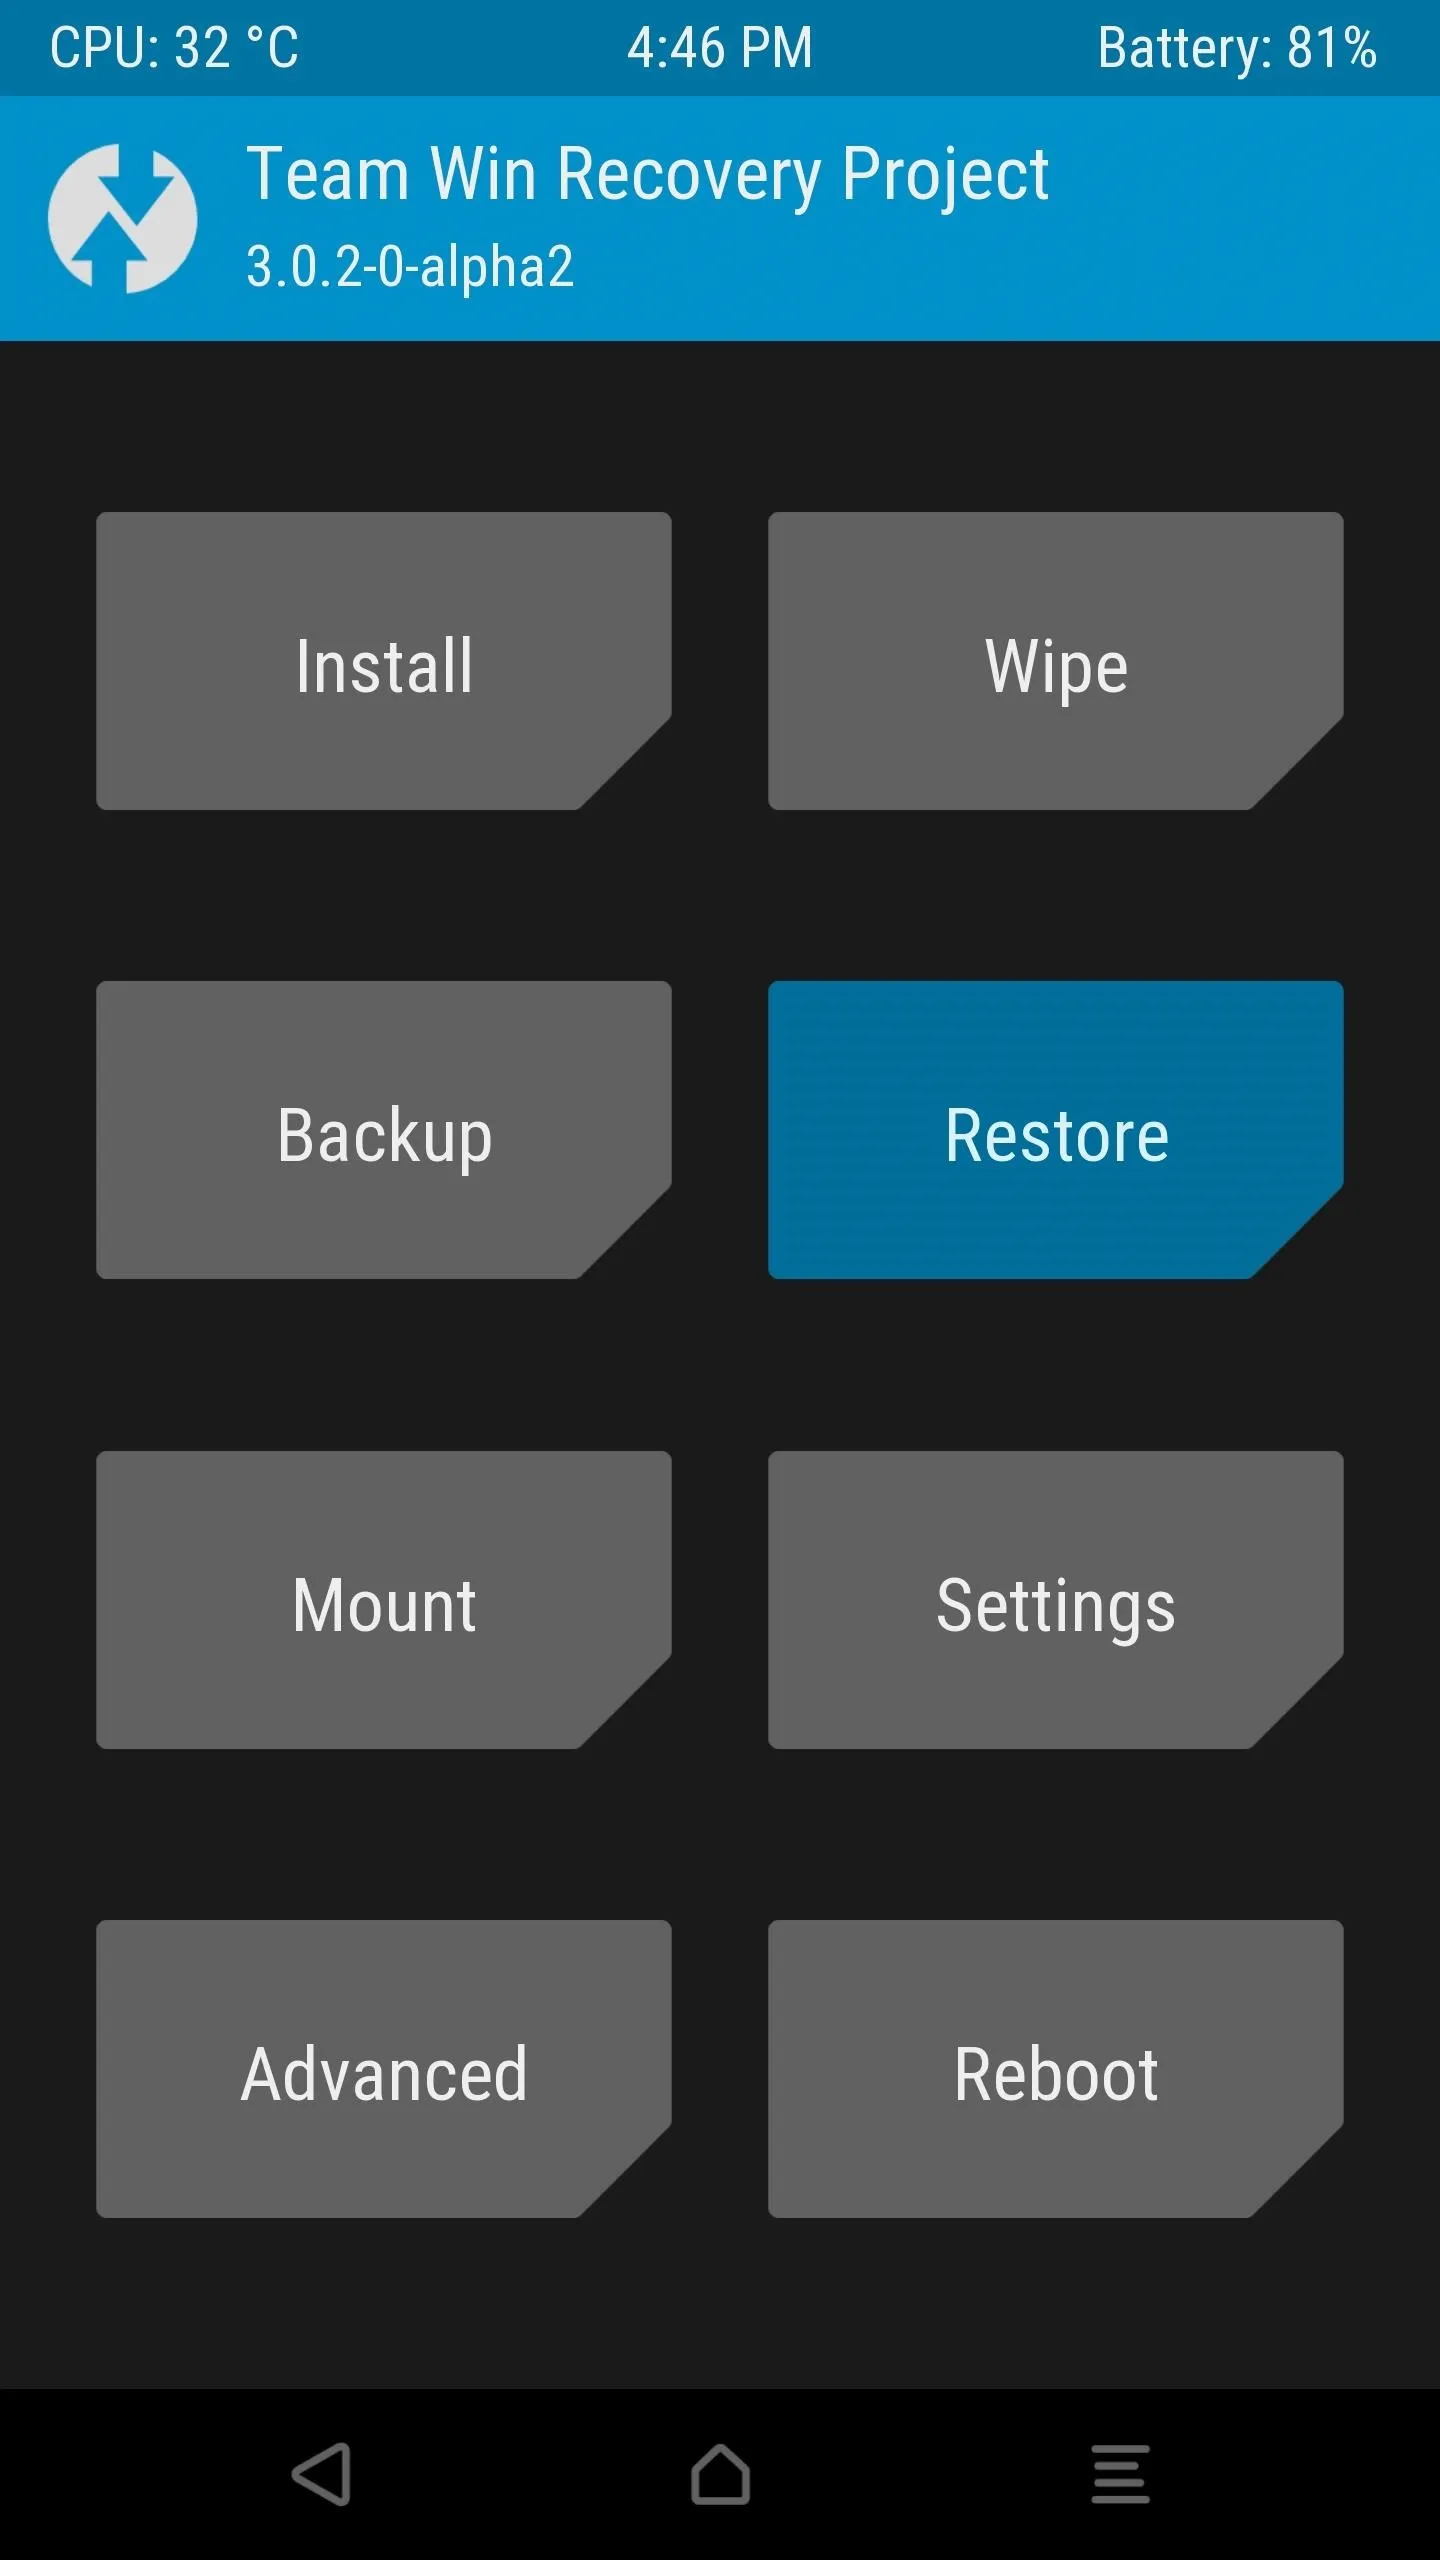
- From the TWRP home screen, tap the “Restore” button.TWRP home screen — tap “Restore”
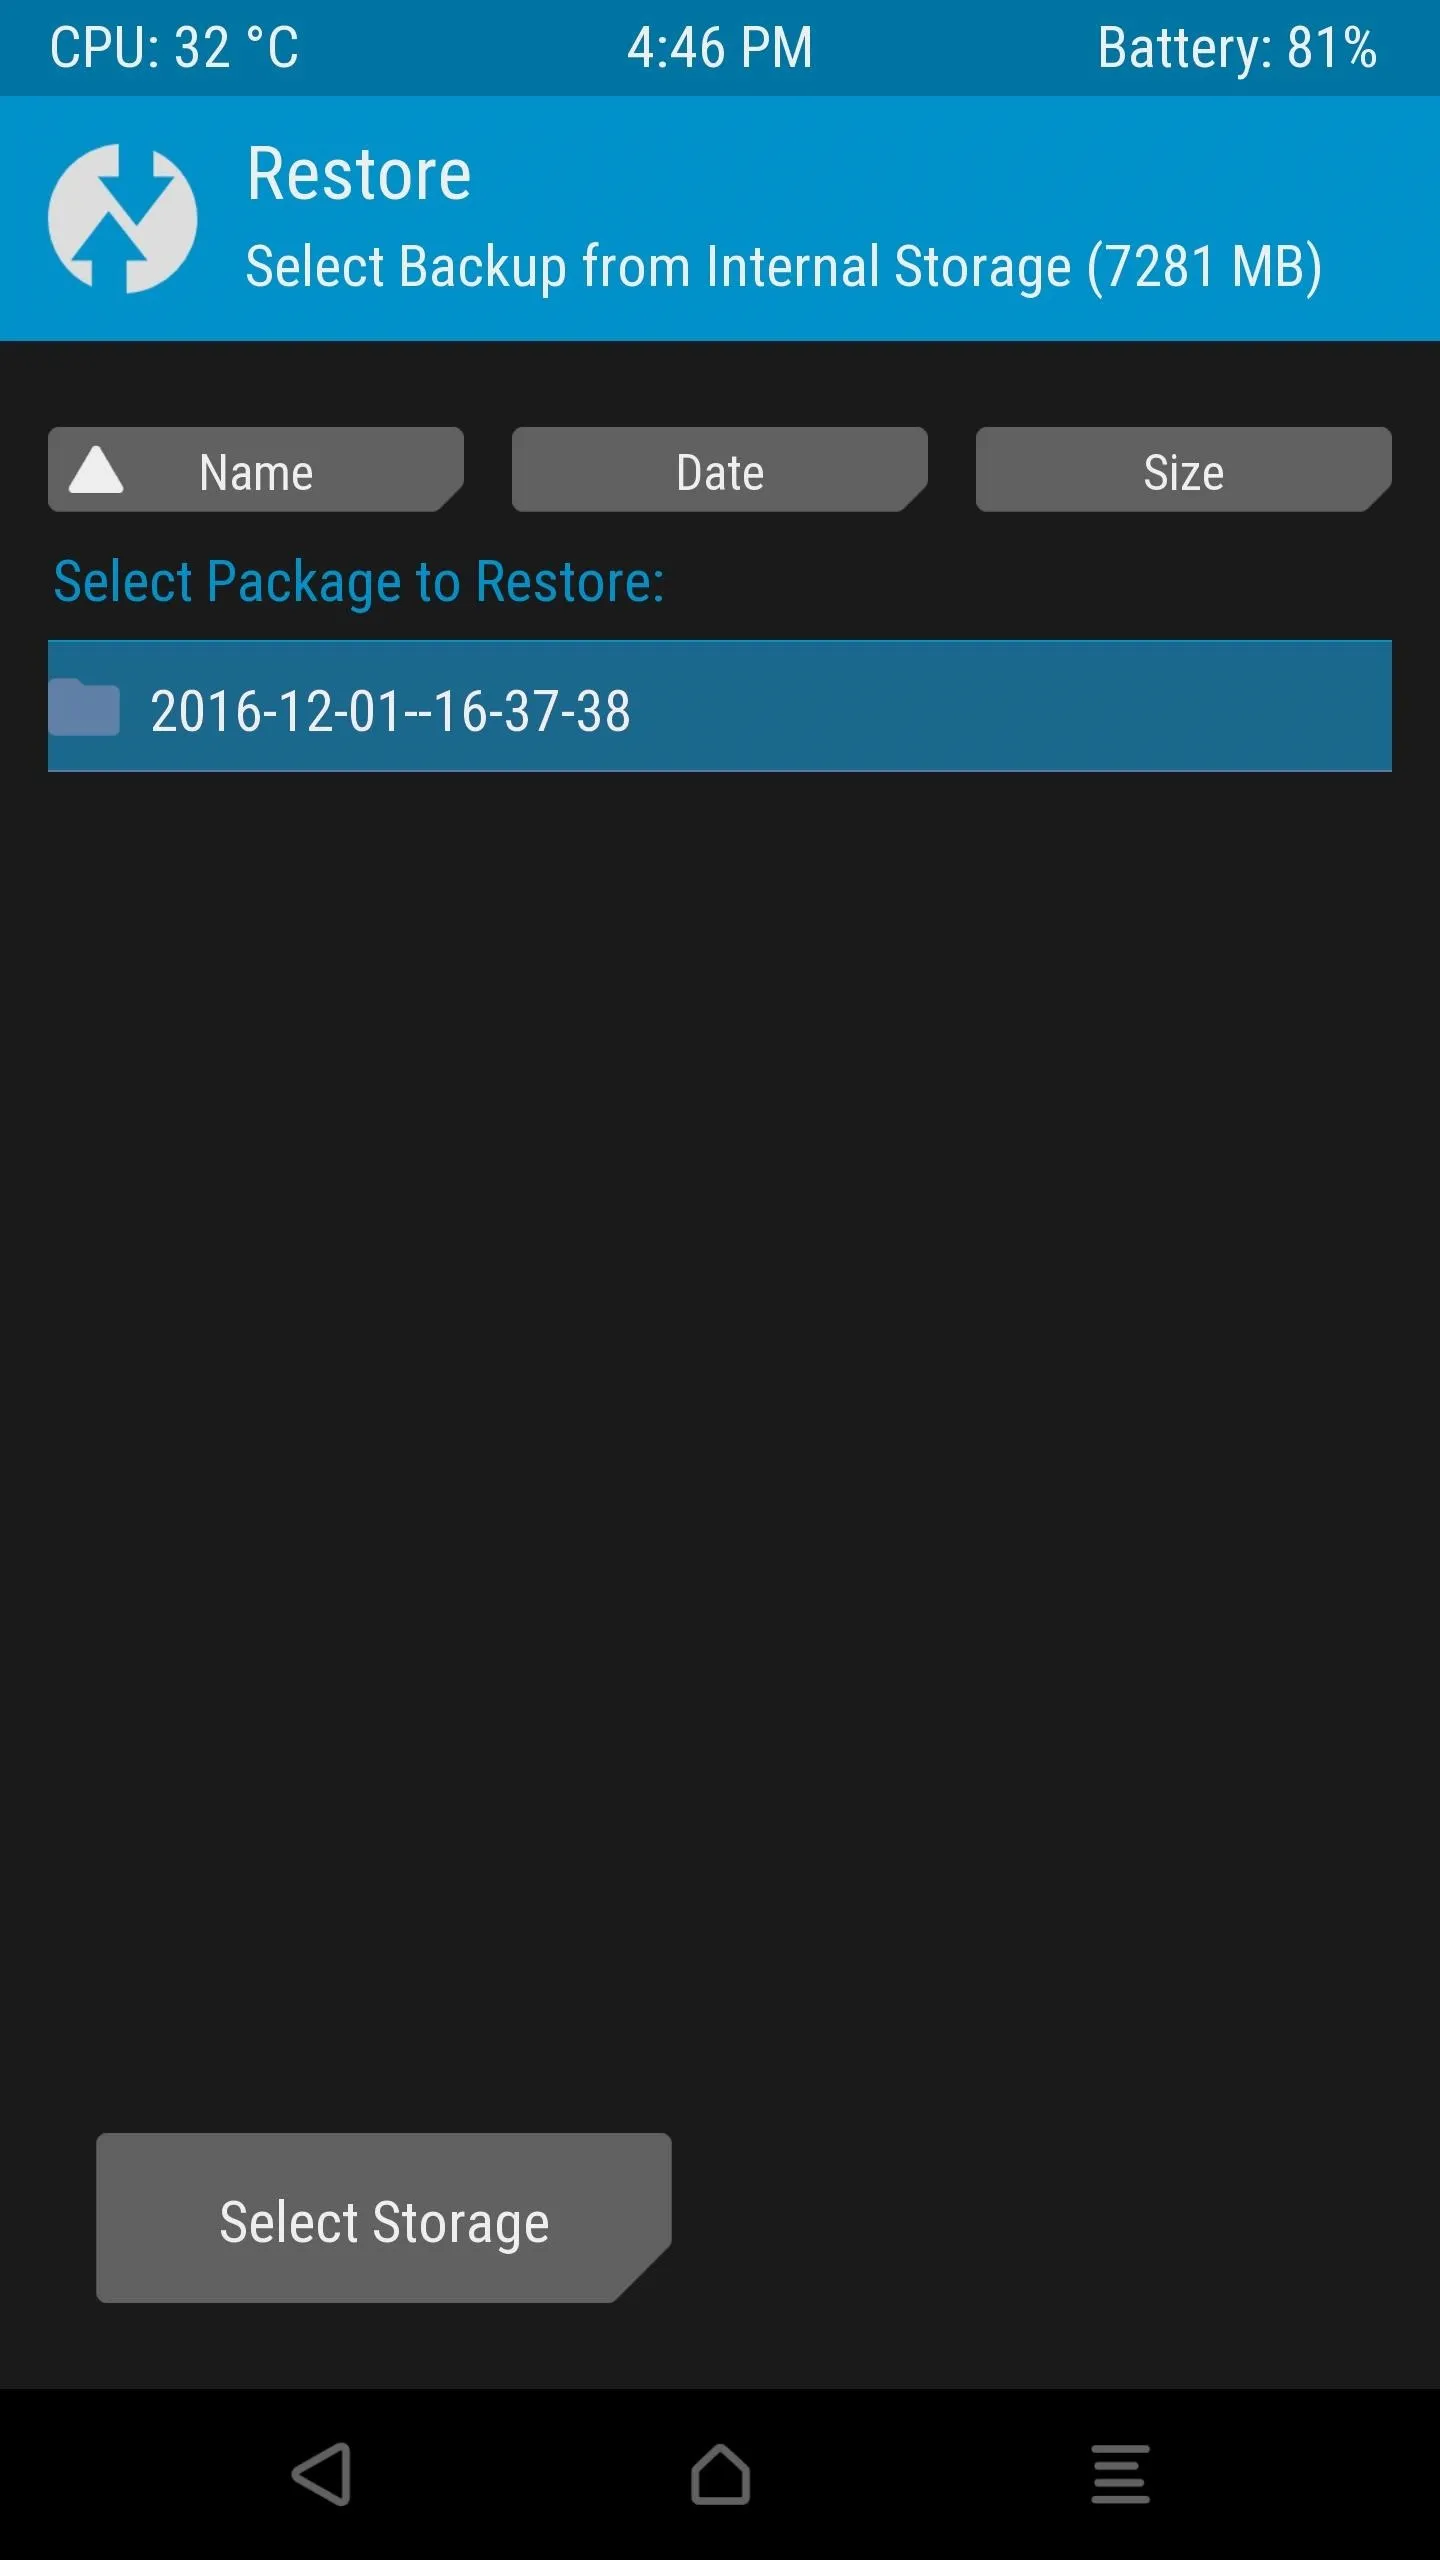
- Select your backup from the list — backups are named by the date they were created.Select a backup from the list
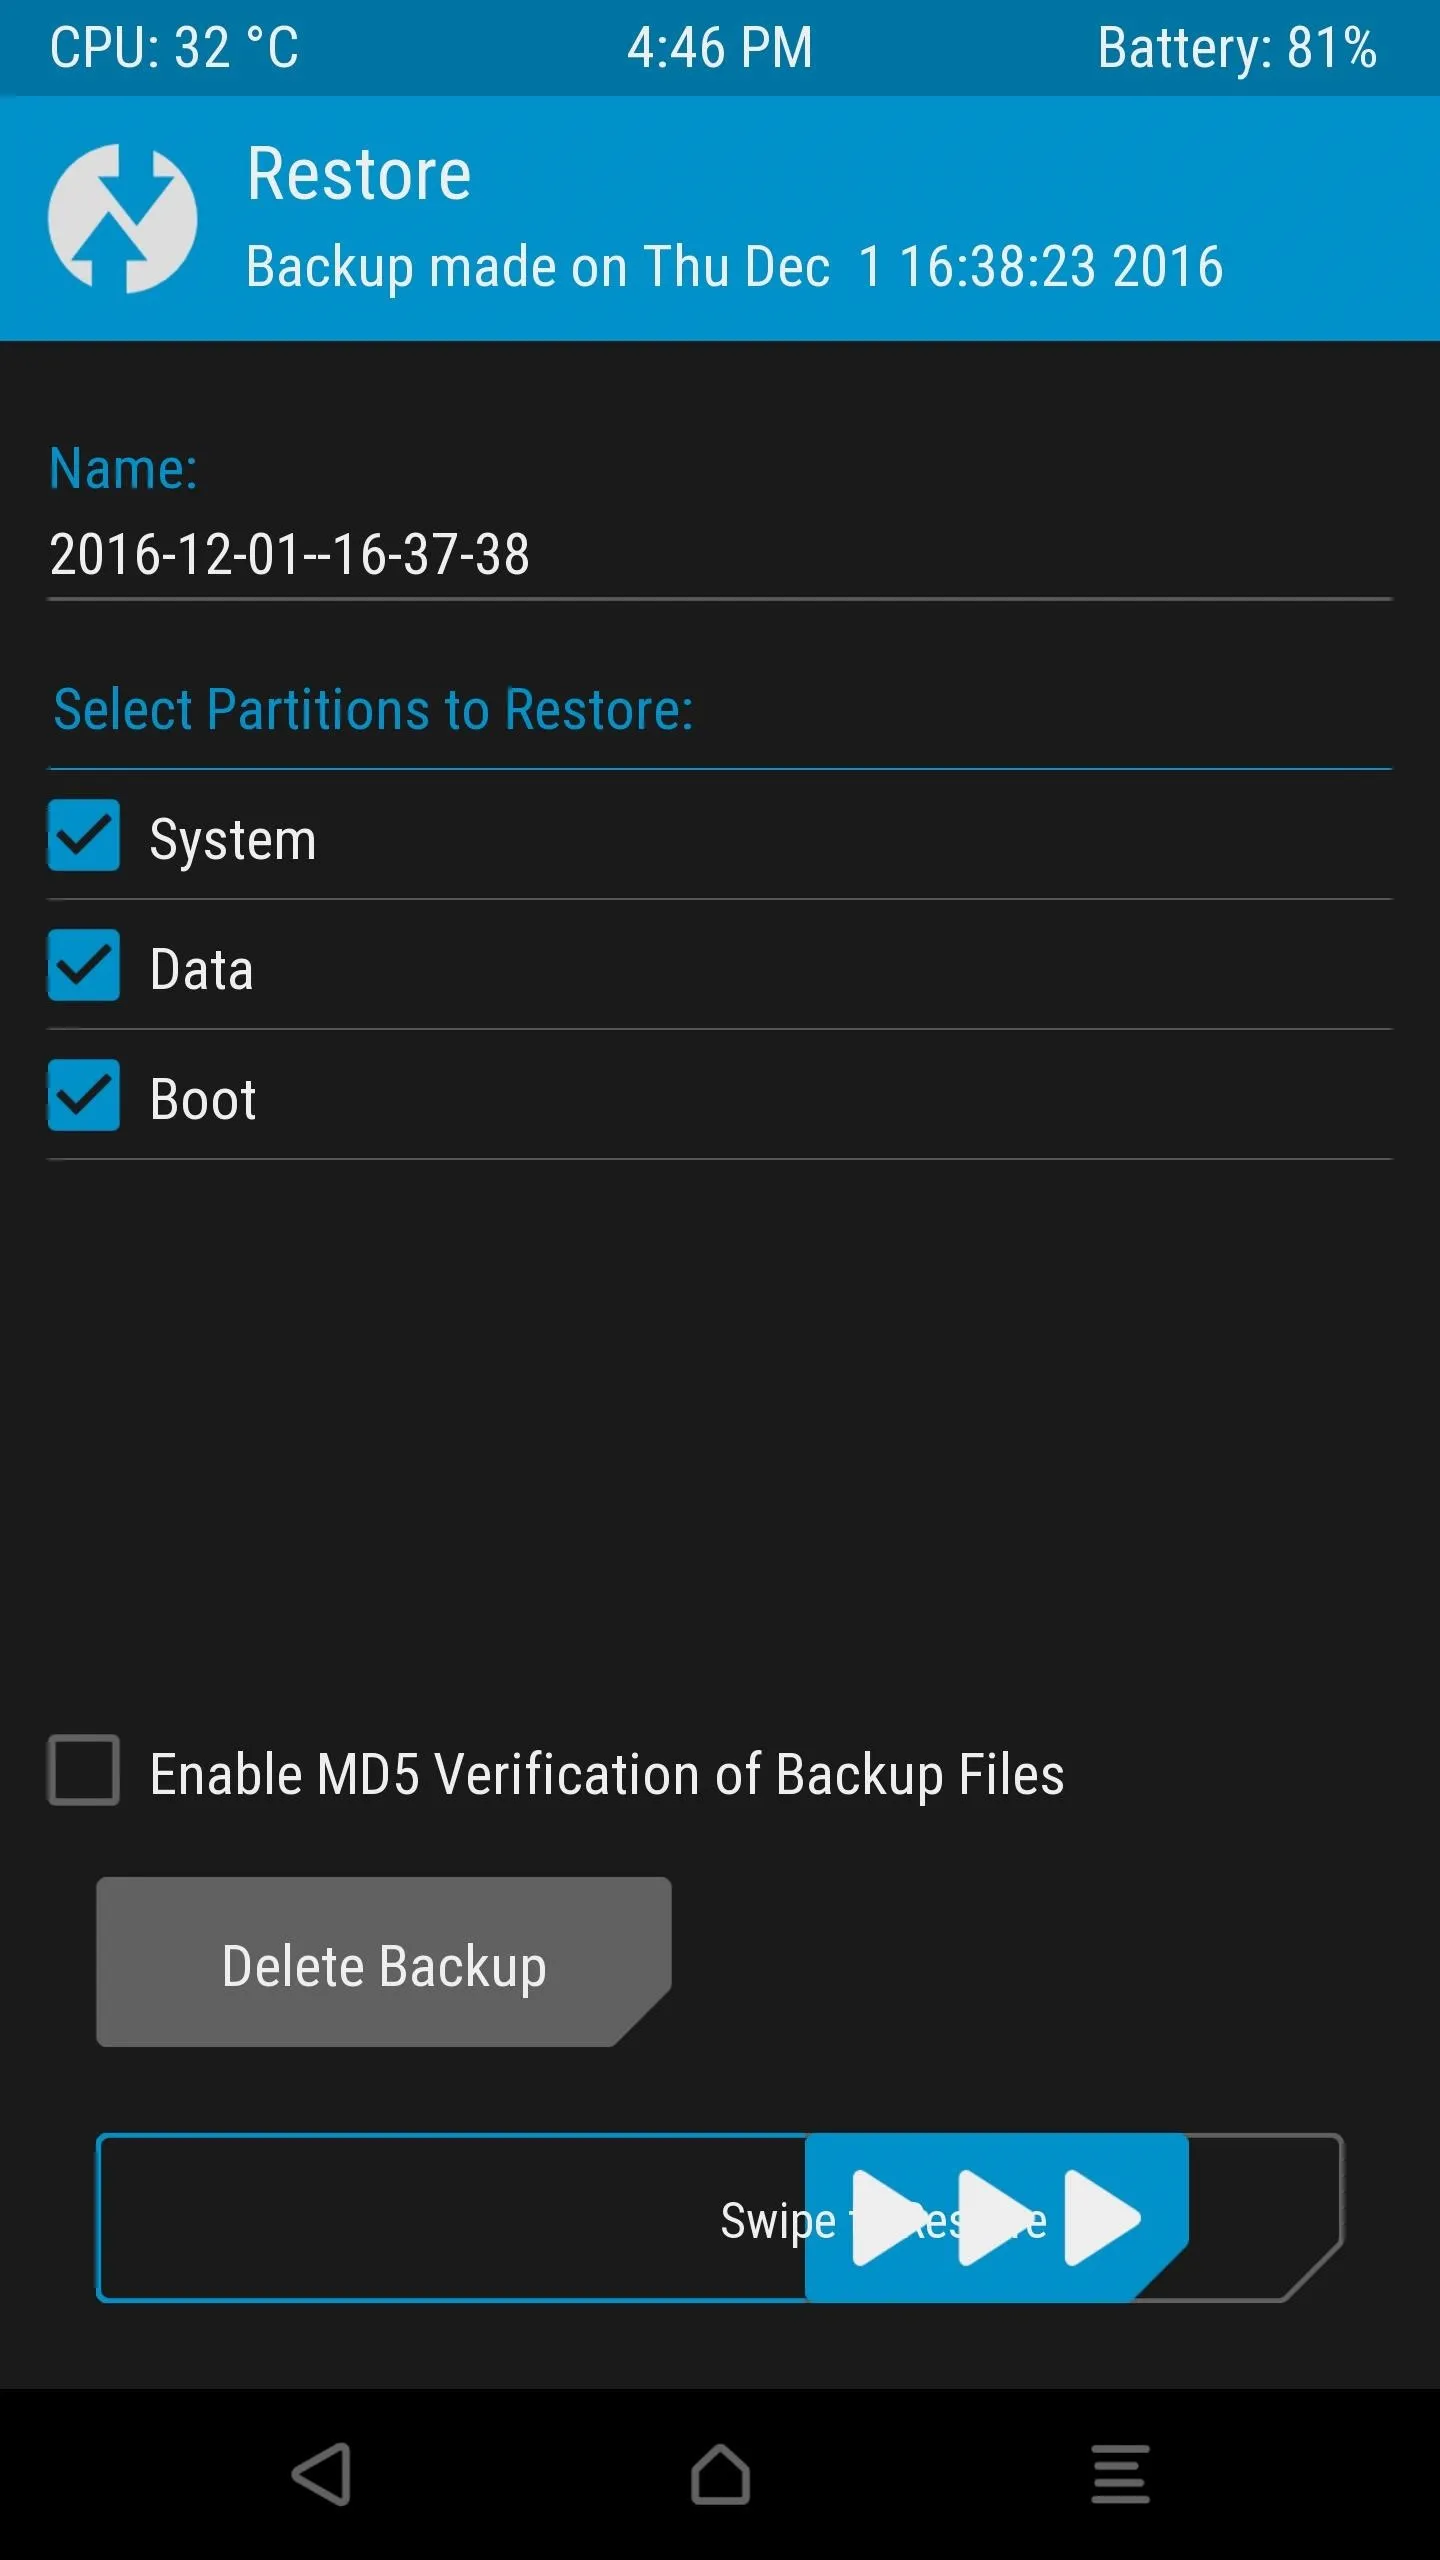
- Confirm the partitions to restore (Boot, System, Data), then swipe the slider to begin. Allow up to 15 minutes.Confirm partitions and swipe to restore
- When finished, tap “Reboot System” — your phone will be restored to its previous state.Restore complete — tap Reboot System