
- 1.6150mAh Monster Battery, Fast 18W Charge & 10W Reverse Charge. With the 6150mAh enormous battery and AI power management, your UMIDIGI Power 3 can last longer than ever. And the 18W Fast Charging gets you up and running in just a while.
![]()
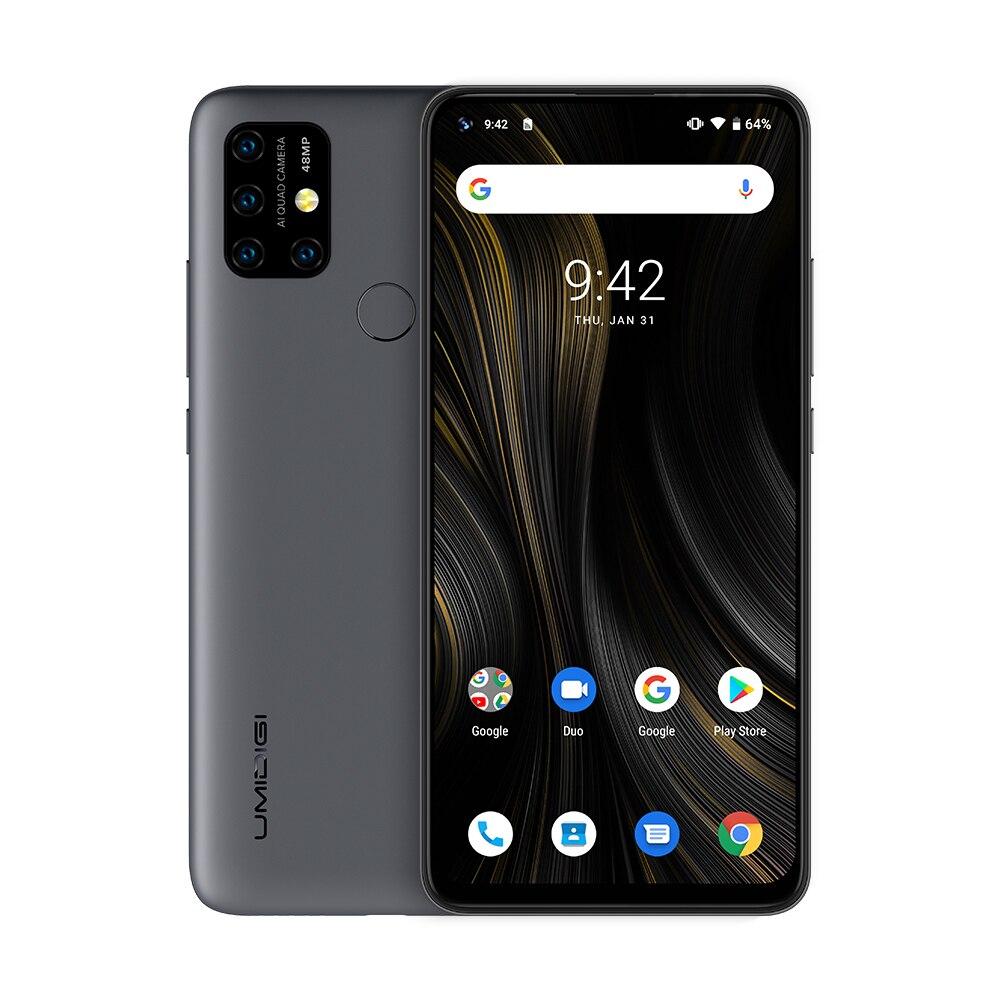
Camera Specification
- Four AI Camera Team, 48MP primary camera+13MP ultra-wide-angle camera+5MP depth camera+5MP macro camera. No matter close or far, These cameras can bring to you close to vivid pictures, capture every detail. The 16MP AI front camera on UMIDIGI Power 3 makes your every selfie clear, beautiful and natural. It also allows you to enhance images with AI Beautification.
What is Google Camera (Gcam)!
If you’re a mobile photography lover then you should know about the GCam app. But if you don’t know, then the Google Camera app offers plenty of useful features like Portrait mode, AR Stickers, Google Lens suggestion, PhotoSphere, Lens Blur, Night Sight, HDR+ enhanced, RAW image support, and more. All of these features can also be found on other stock camera apps but they can’t be so effective when it comes to the performance.
The Google Camera app simply delivers the best in the class image and video quality even in low lighting conditions. The portrait mode, saturation level, brightness level, exposure, dynamic range, background blur effect with nice edge detection, etc are properly maintained on the images taken from the GCam app. Form the very first use, you can start noticing the difference.
Important Notes!
So, If you installed the APK and when you try to open it, it is not working? No problem, we have got you covered.
1. Check Camera2API support: Google Camera needs Camera2API support on your device to work properly. How to check if your phone has Camer2API support? Follow this guide: How To Check Camera2 API Support on Android? Find Out.
▼Download Google Camera (GCam)▼
(Please Try every APK file linked below)
GCam APK: Download
▼Video Instruction▼
(Please ignore config file if its not available in the download section)
Steps to Install Google Camera
1. Download the GCam APK file on your device from the link above.
2. Tap on the APK file > It may ask you to enable the Unknown Sources option at first.
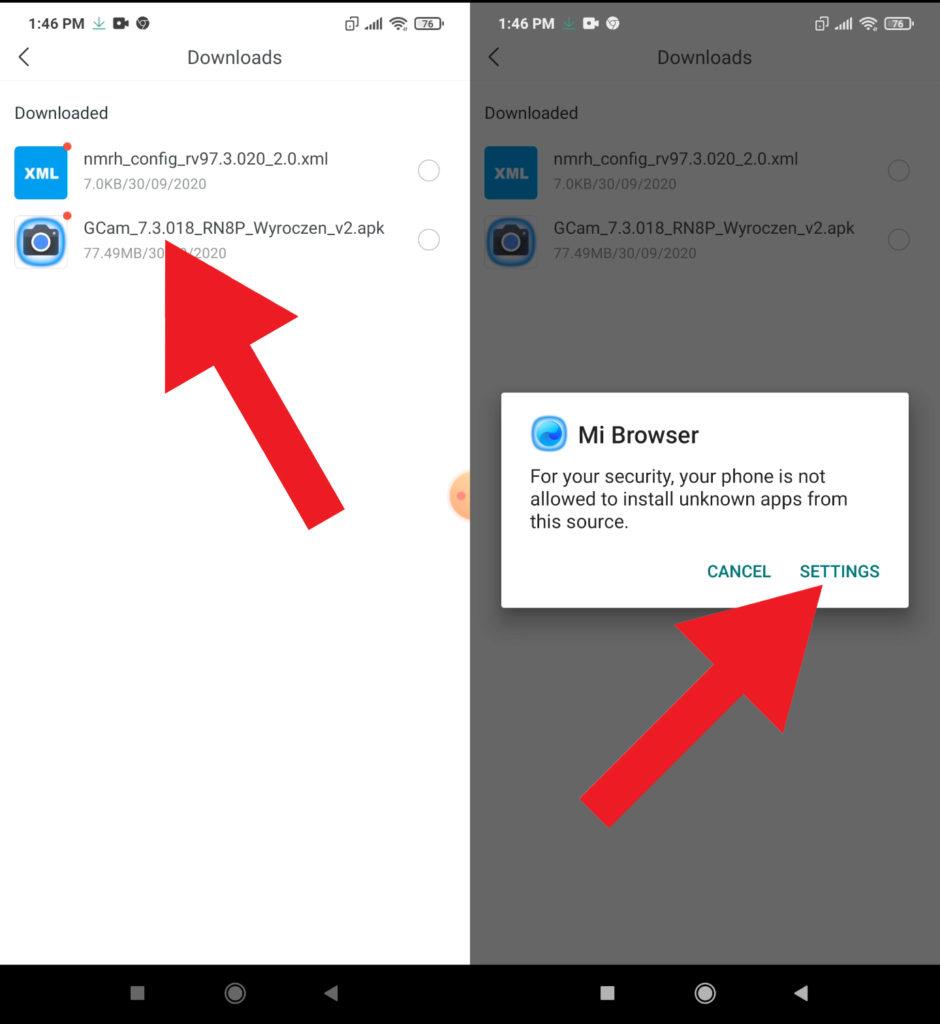
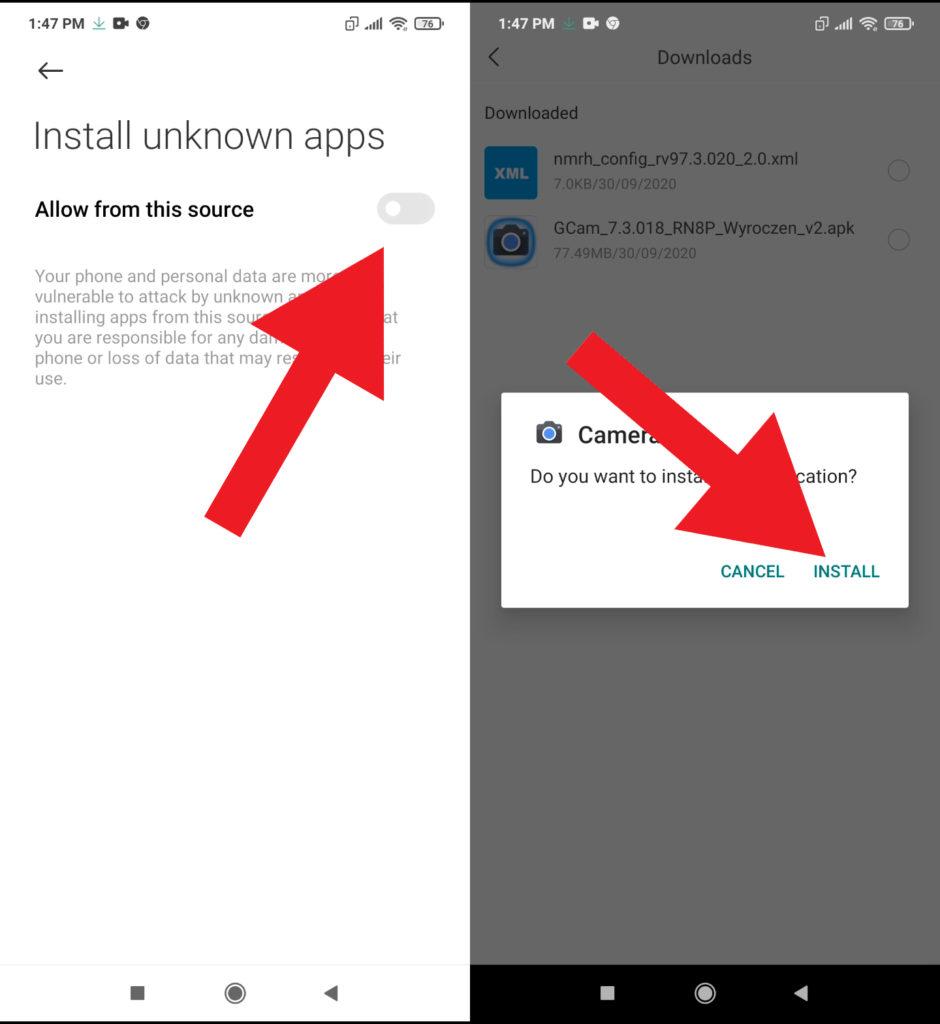
3. Go to the device Settings > Security or Privacy > Additional Settings.
4. Once the Unknown Sources enabled, tap on the Install button.
5. Now, open the Google Camera app and allow some of the permissions.
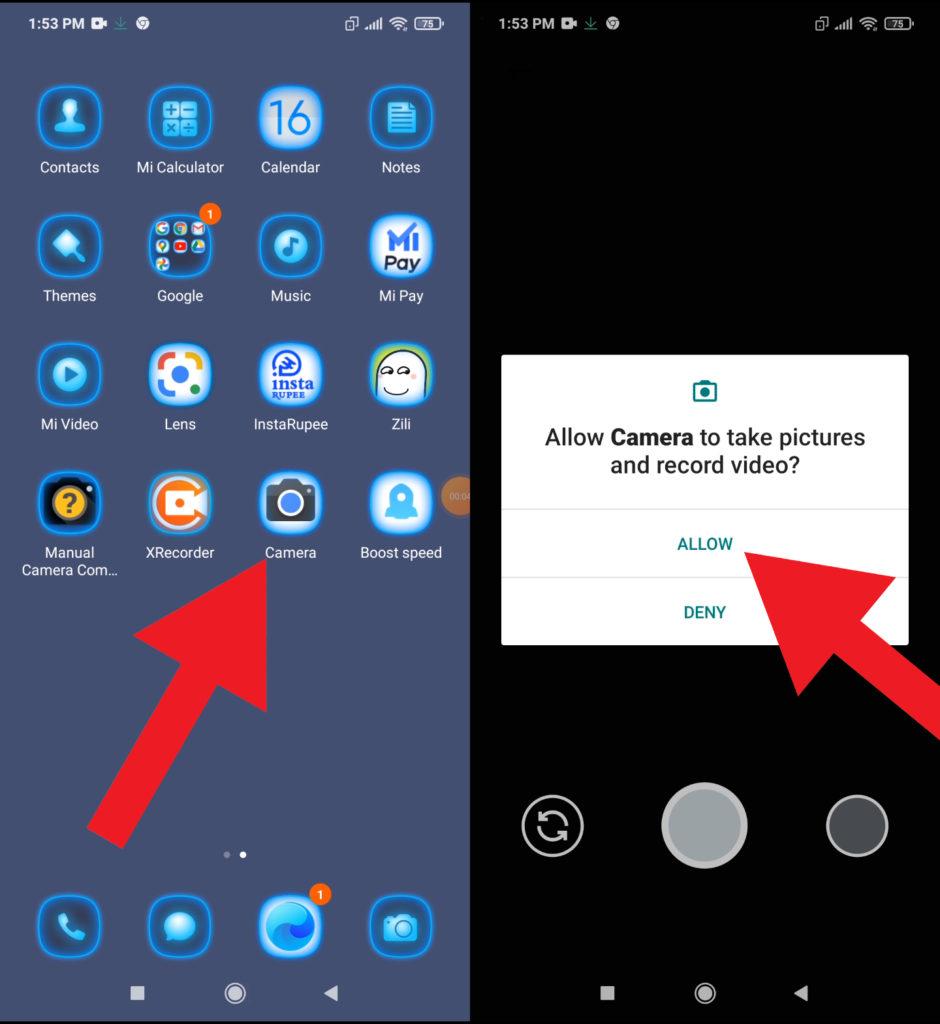
That’s it. You’re done.
So, there you have it from my side in this post. I hope you liked this post and were successful in installing the GCam or the Google Camera port for your smartphones. Let us know in the comments which features were far better with the GCam as compared to the stock camera application.