
The Galaxy A52 has a big 6.5-inch full-HD+ display with a hole-punch display. It has thin bezels on the sides while the chin is marginally thicker. The frame of the smartphone is made of plastic and doesn’t feel as premium as it looks. You have the power and the volume buttons on the right. The power button is convenient to hit, but the volume buttons need a slight stretch to reach. The left side of the Galaxy A52 does not have any buttons or slots. The SIM tray is at the top along with the secondary microphone. The Galaxy A52 is IP67 rated and you will find a rubber seal around the SIM tray to help keep water and dust out. At the bottom, the Galaxy A52 has the USB Type-C port, the loudspeaker, and the 3.5mm headphone jack.![]()

Camera Specification
The Samsung Galaxy A52 has a quad-camera setup at the back. This is comprised of a 64-megapixel primary camera, a 12-megapixel ultra-wide angle camera, a 5-megapixel macro camera, and a 5-megapixel depth sensor. For selfies, it has a 32-megapixel front shooter. The camera app is similar to what you’ll get on most other Samsung smartphones, and finding the setting you are looking for isn’t that hard. There is a Scene optimiser that detects what the camera is pointed towards and helps to set the scene up. It worked quickly rarely failed to recognise the scene I was shooting. The camera was also quick to lock focus and never needed manual intervention at any point.
What is Google Camera (Gcam)!
If you’re a mobile photography lover then you should know about the GCam app. But if you don’t know, then the Google Camera app offers plenty of useful features like Portrait mode, AR Stickers, Google Lens suggestion, PhotoSphere, Lens Blur, Night Sight, HDR+ enhanced, RAW image support, and more. All of these features can also be found on other stock camera apps but they can’t be so effective when it comes to the performance.
The Google Camera app simply delivers the best in the class image and video quality even in low lighting conditions. The portrait mode, saturation level, brightness level, exposure, dynamic range, background blur effect with nice edge detection, etc are properly maintained on the images taken from the GCam app. Form the very first use, you can start noticing the difference.
Important Notes!
So, If you installed the APK and when you try to open it, it is not working? No problem, we have got you covered.
1. Check Camera2API support: Google Camera needs Camera2API support on your device to work properly. How to check if your phone has Camer2API support? Follow this guide: How To Check Camera2 API Support on Android? Find Out.
▼Download Google Camera (GCam)▼
(Please Try every APK file linked below)
GCam APK: Download
▼Video Instruction▼
(Please ignore config file if its not available in the download section)
Steps to Install Google Camera
1. Download the GCam APK file on your device from the link above.
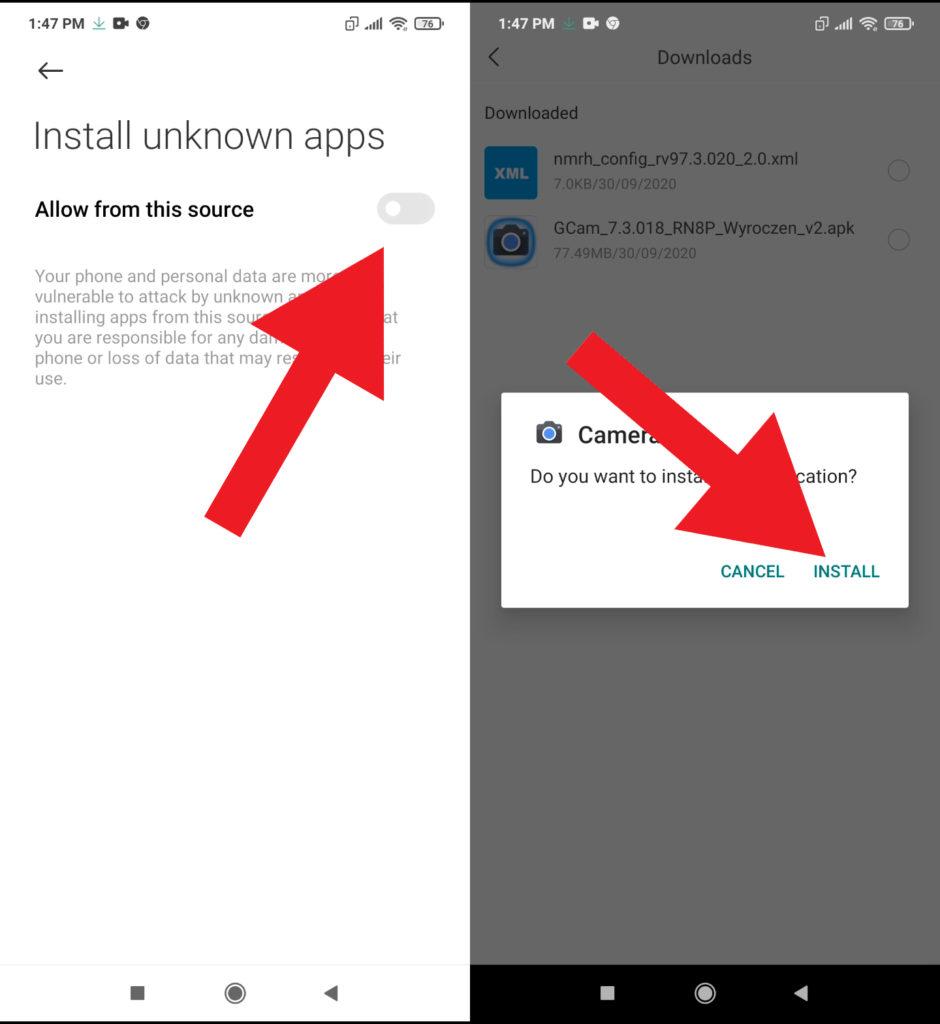
2. Tap on the APK file > It may ask you to enable the Unknown Sources option at first.
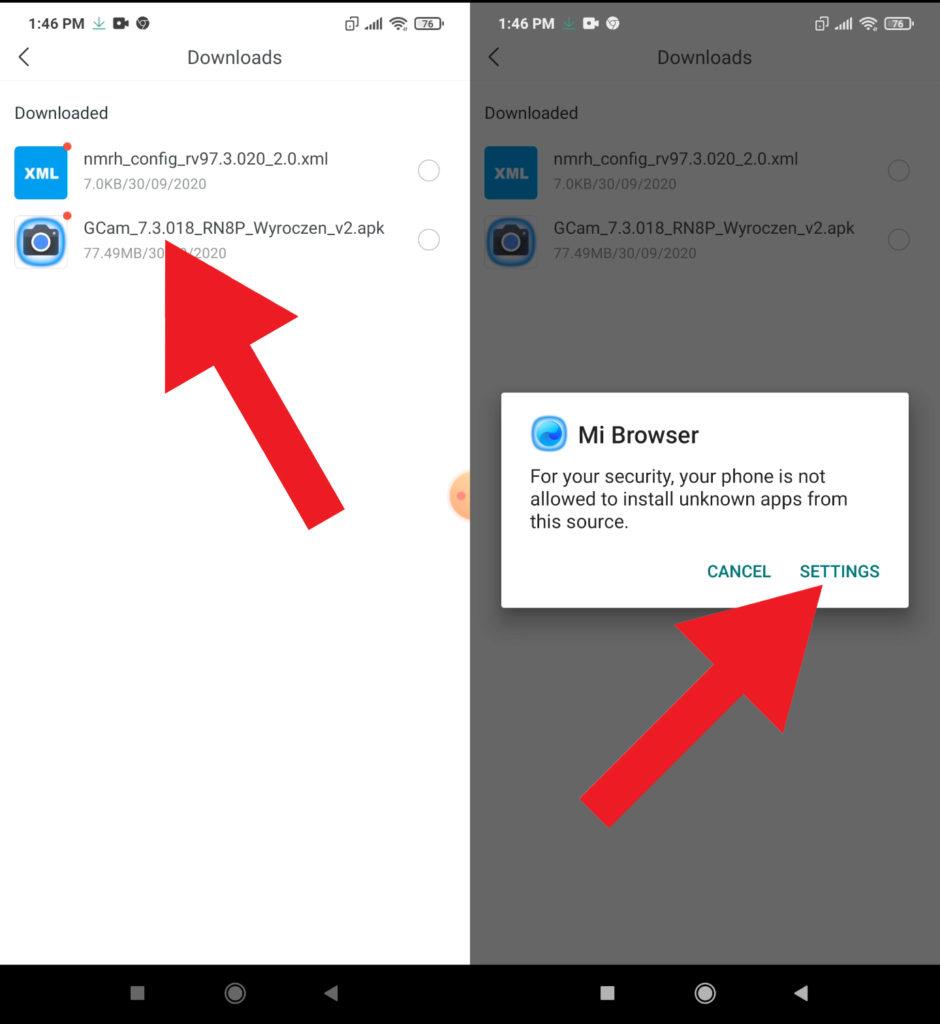
3. Go to the device Settings > Security or Privacy > Additional Settings.
4. Once the Unknown Sources enabled, tap on the Install button.
5. Now, open the Google Camera app and allow some of the permissions.
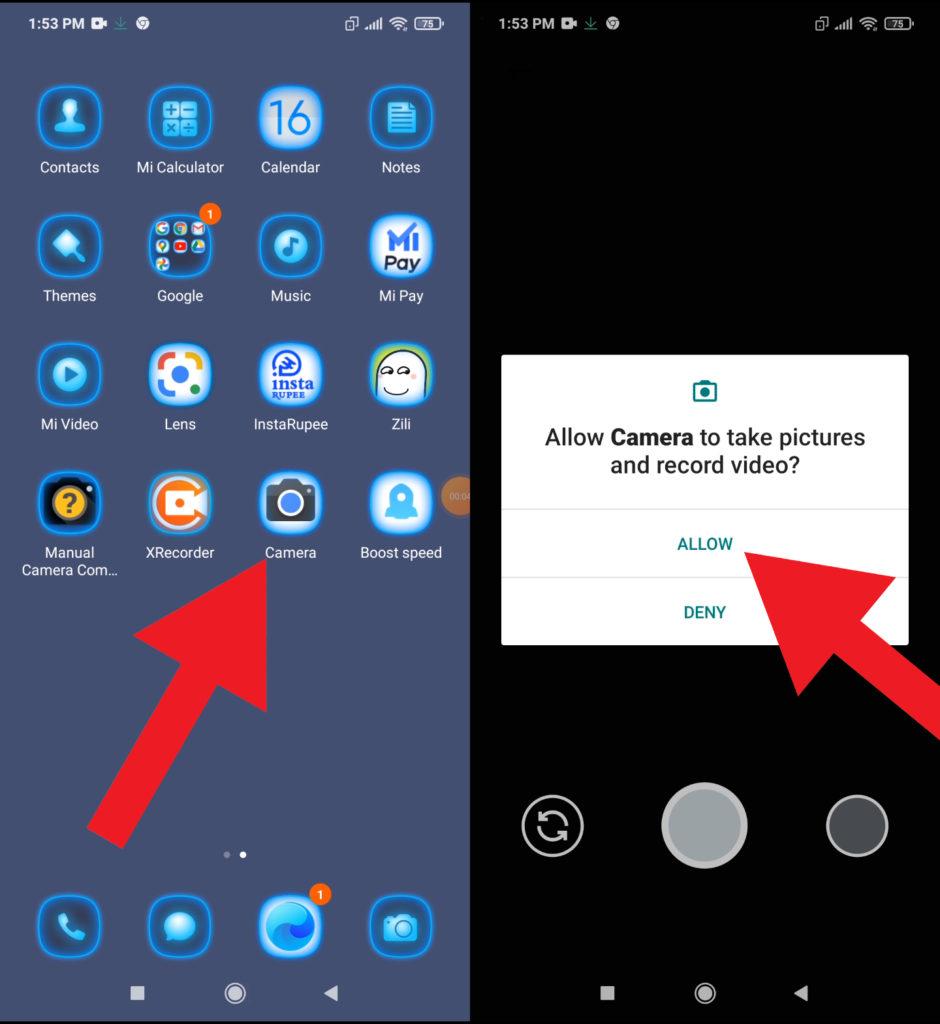
That’s it. You’re done.
So, there you have it from my side in this post. I hope you liked this post and were successful in installing the GCam or the Google Camera port for your smartphones. Let us know in the comments which features were far better with the GCam as compared to the stock camera application.